How to Make a Stunning Fall Dessert Board – Easy, No-Bake & Perfect for Entertaining
Fall is hands-down one of the coziest, most delicious seasons of the year. Between pumpkin spice everything, warm cinnamon scents, crunchy leaves, and all the irresistible desserts that come with cooler weather, autumn practically begs us to gather with friends and family around a table of sweet treats. And what better way to celebrate the season than with a fall dessert board overflowing with color, texture, and your favorite indulgences?
If you love charcuterie boards, grazing tables, or anything that brings together beautiful food styling and easy entertaining, this fall dessert board is about to become your new favorite go-to. It’s beginner-friendly, requires zero baking, and is endlessly customizable—so it works for casual gatherings, Thanksgiving, pumpkin-carving parties, potlucks, or even cozy movie nights at home.
This post will walk you through exactly how to build the board step-by-step, share ideas for ingredient swaps, plus give you tips on styling, storage, and serving. Whether you’re a seasoned hostess or a busy mom looking for something simple yet show-stopping, this fall dessert board is the perfect autumn project.
Why a Fall Dessert Board Is the Ultimate Entertaining Hack
We all love desserts—but arranging a dozen different treats into one organized, visually stunning spread? That’s where the real magic happens.
A fall dessert board:
- Looks instantly impressive without hours in the kitchen
- Lets guests sample many flavors—pumpkin, pecan, chocolate, maple, caramel
- Accommodates all ages, from kids to adults
- Requires zero baking, making it ideal for last-minute gatherings
- Is flexible and budget-friendly—use store-bought or mix in homemade treats
You can scale this board up or down depending on the size of your event, and because everything is pre-made, assembly takes just 10 minutes. Yes, really!

Fall Dessert Board Recipe
Difficulty: Easy
Prep Time: 10 minutes
Bake Time: N/A
Servings: 12–16
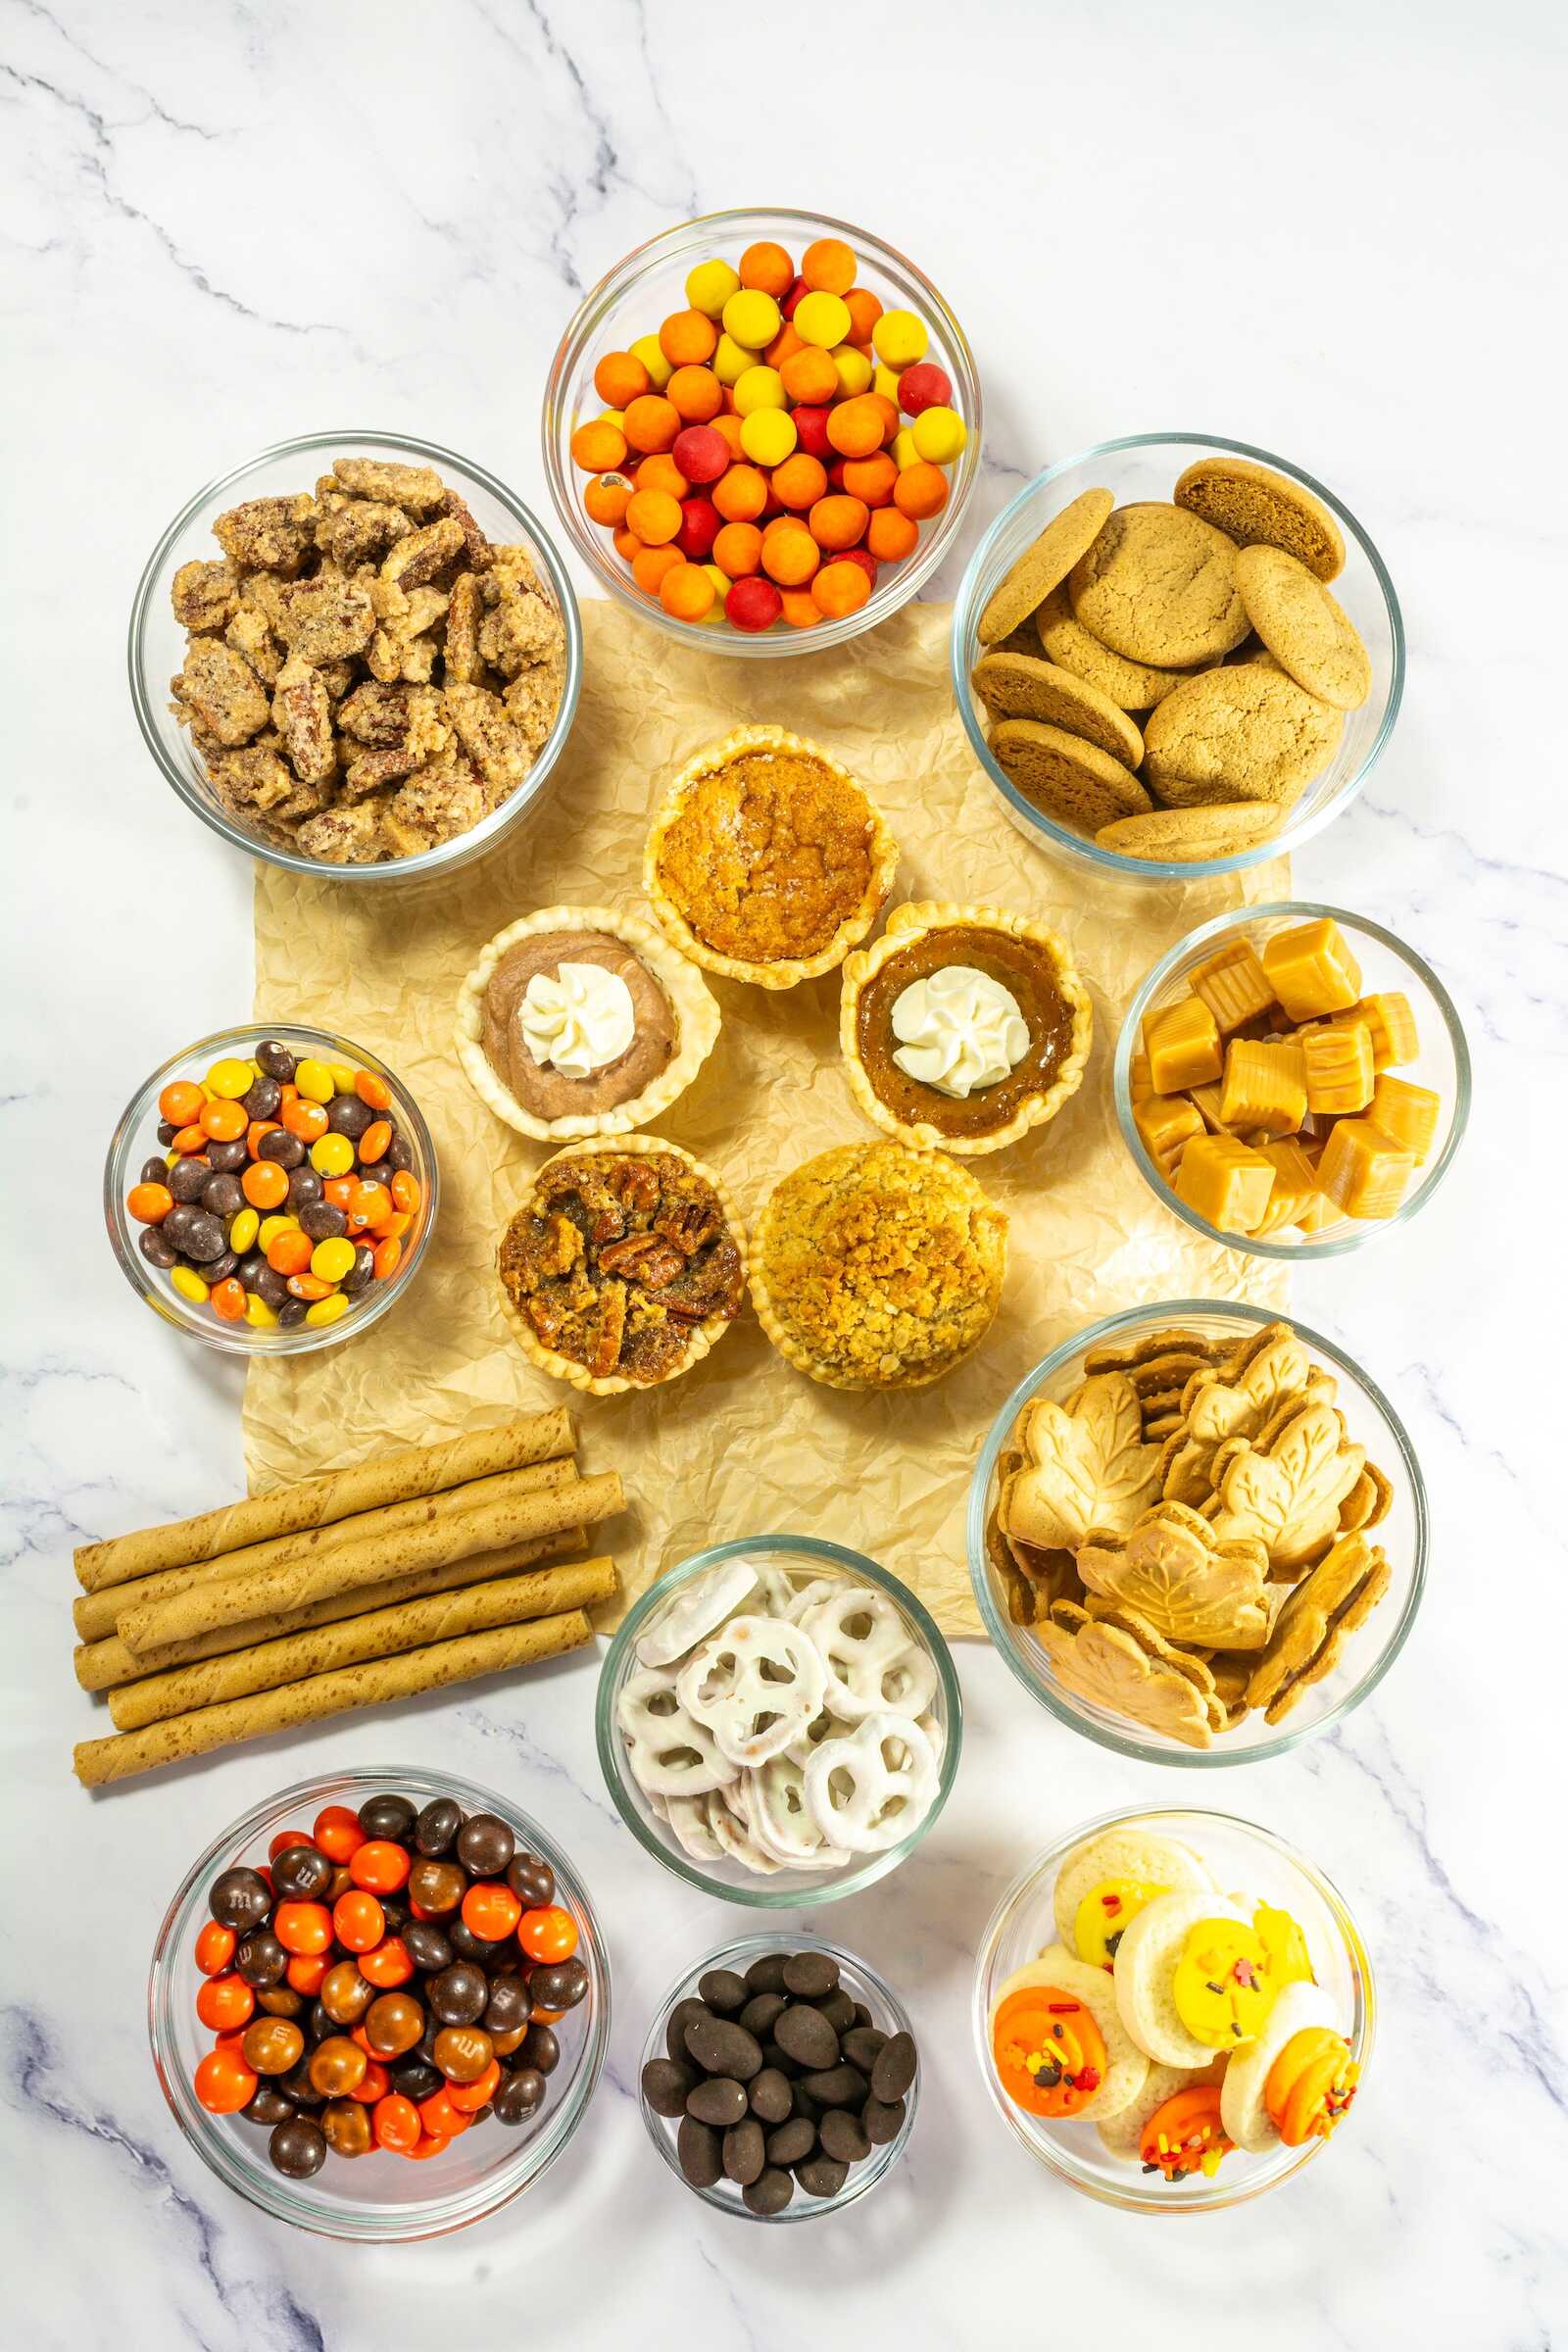
Ingredients for the Ultimate Fall Dessert Board
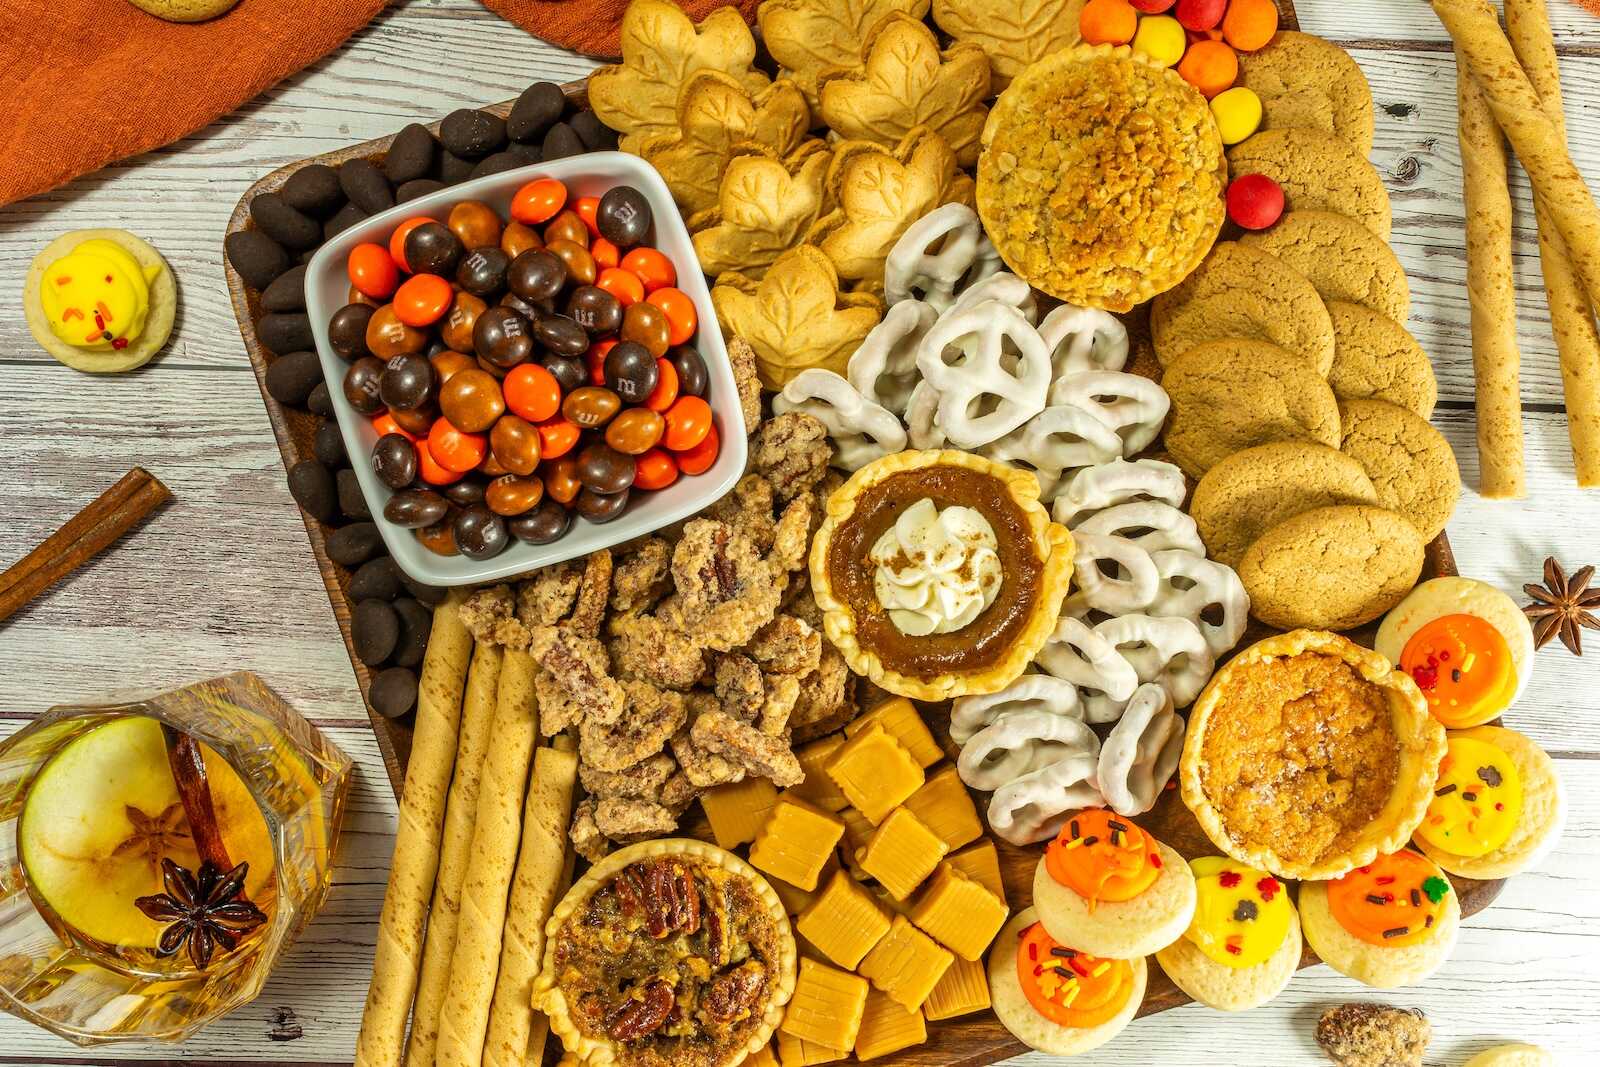
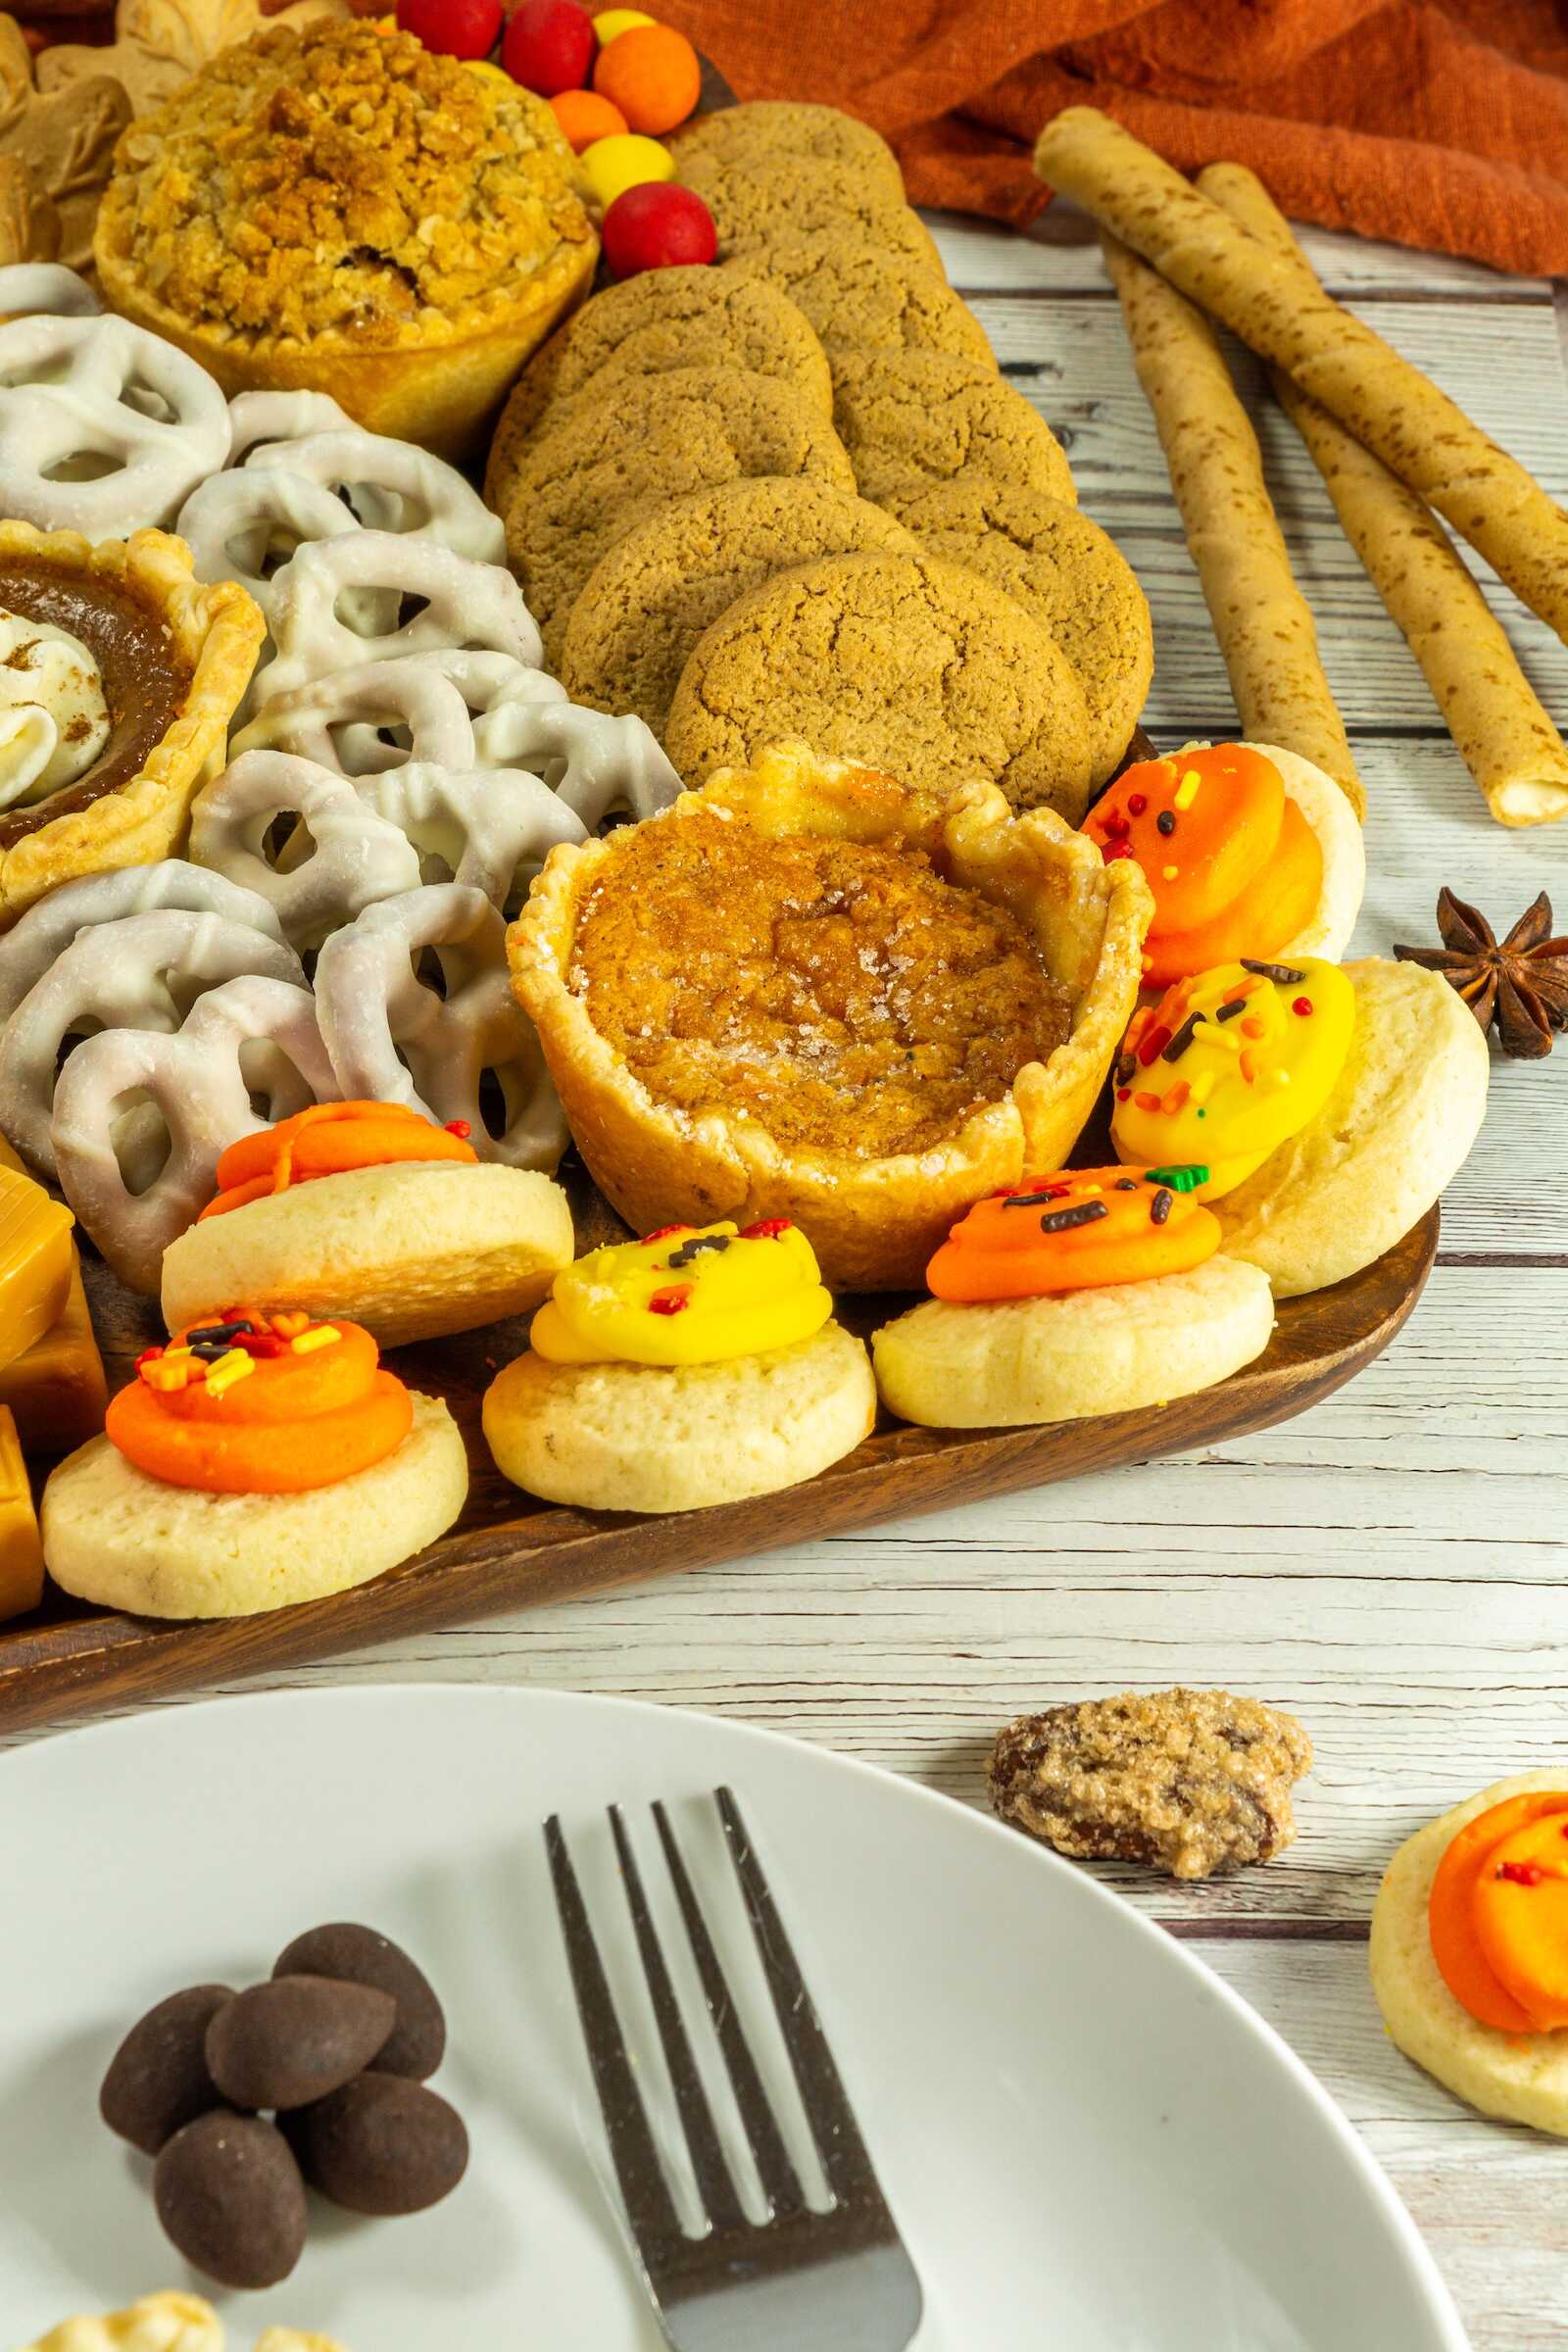
Feel free to mix and match, but here’s the collection of treats used to create a perfectly balanced board full of fall flavors and textures:
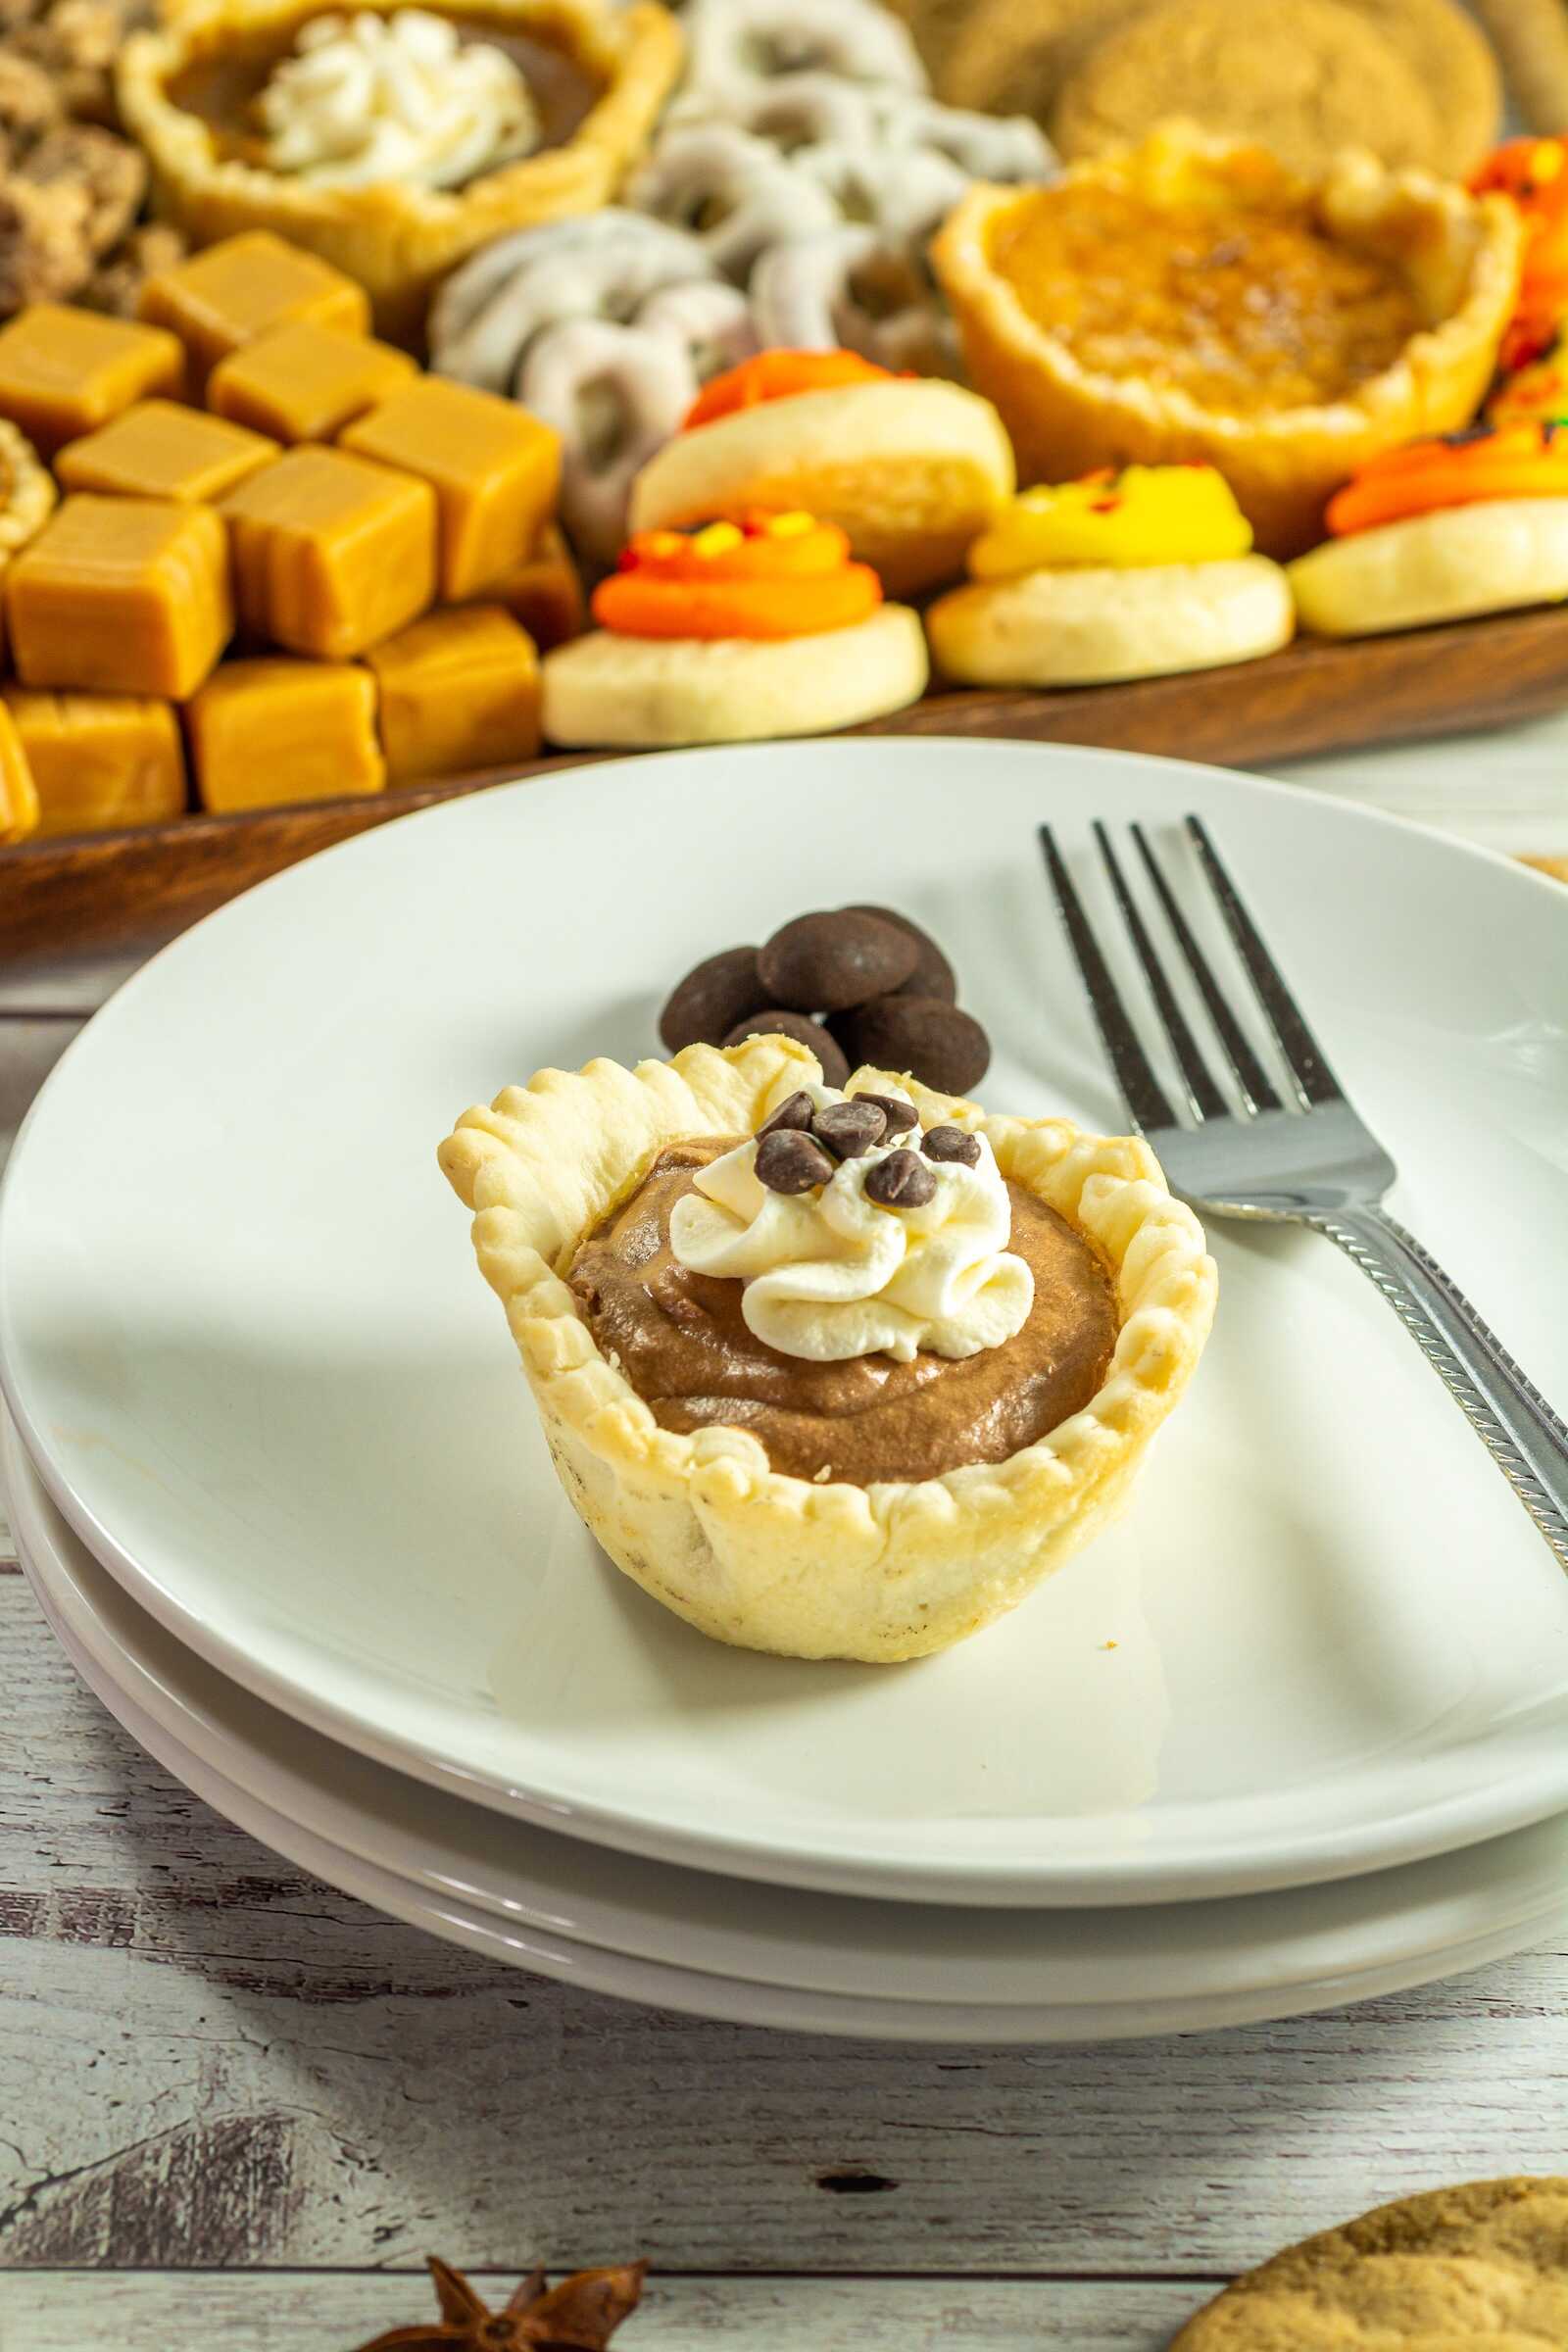
- Premade mini pies (pumpkin, chocolate silk, pecan, sweet potato, Dutch apple, etc.)
- Cadbury chocolate candies (fall colors)
- Candied pecans
- Gingersnap cookies
- Caramel candies, soft and unwrapped
- Reese’s Pieces
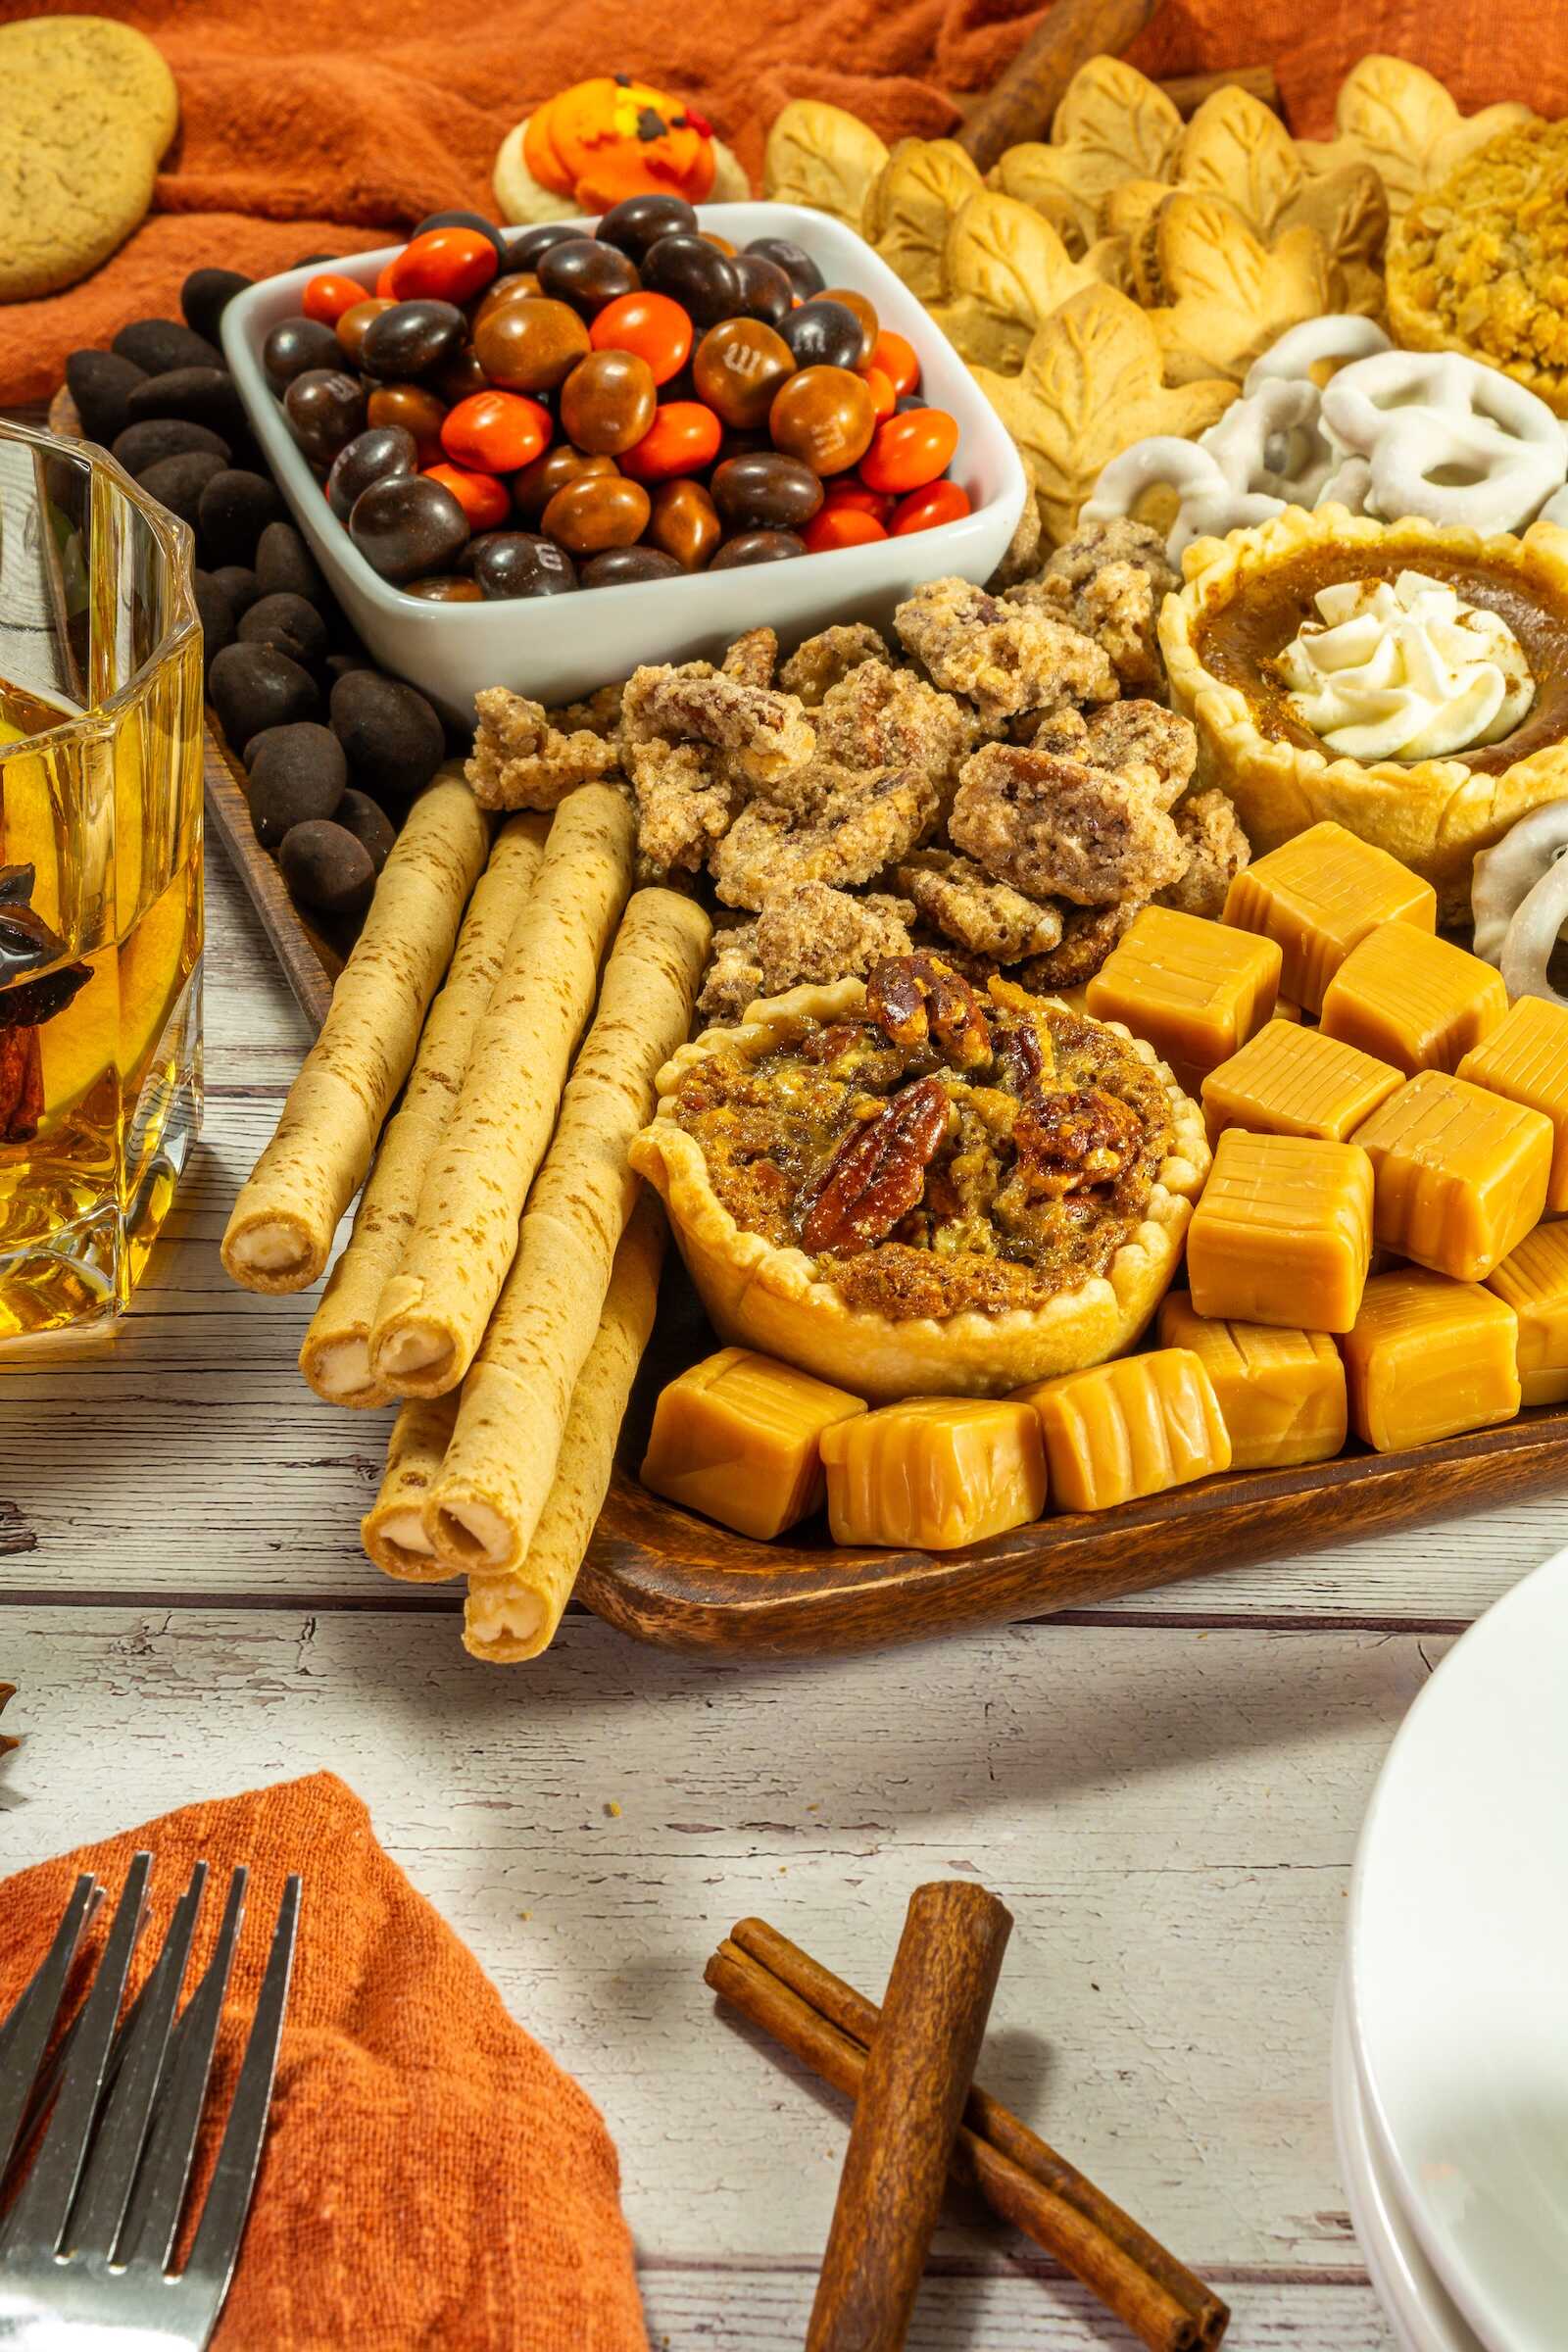
- Pirouette cookies
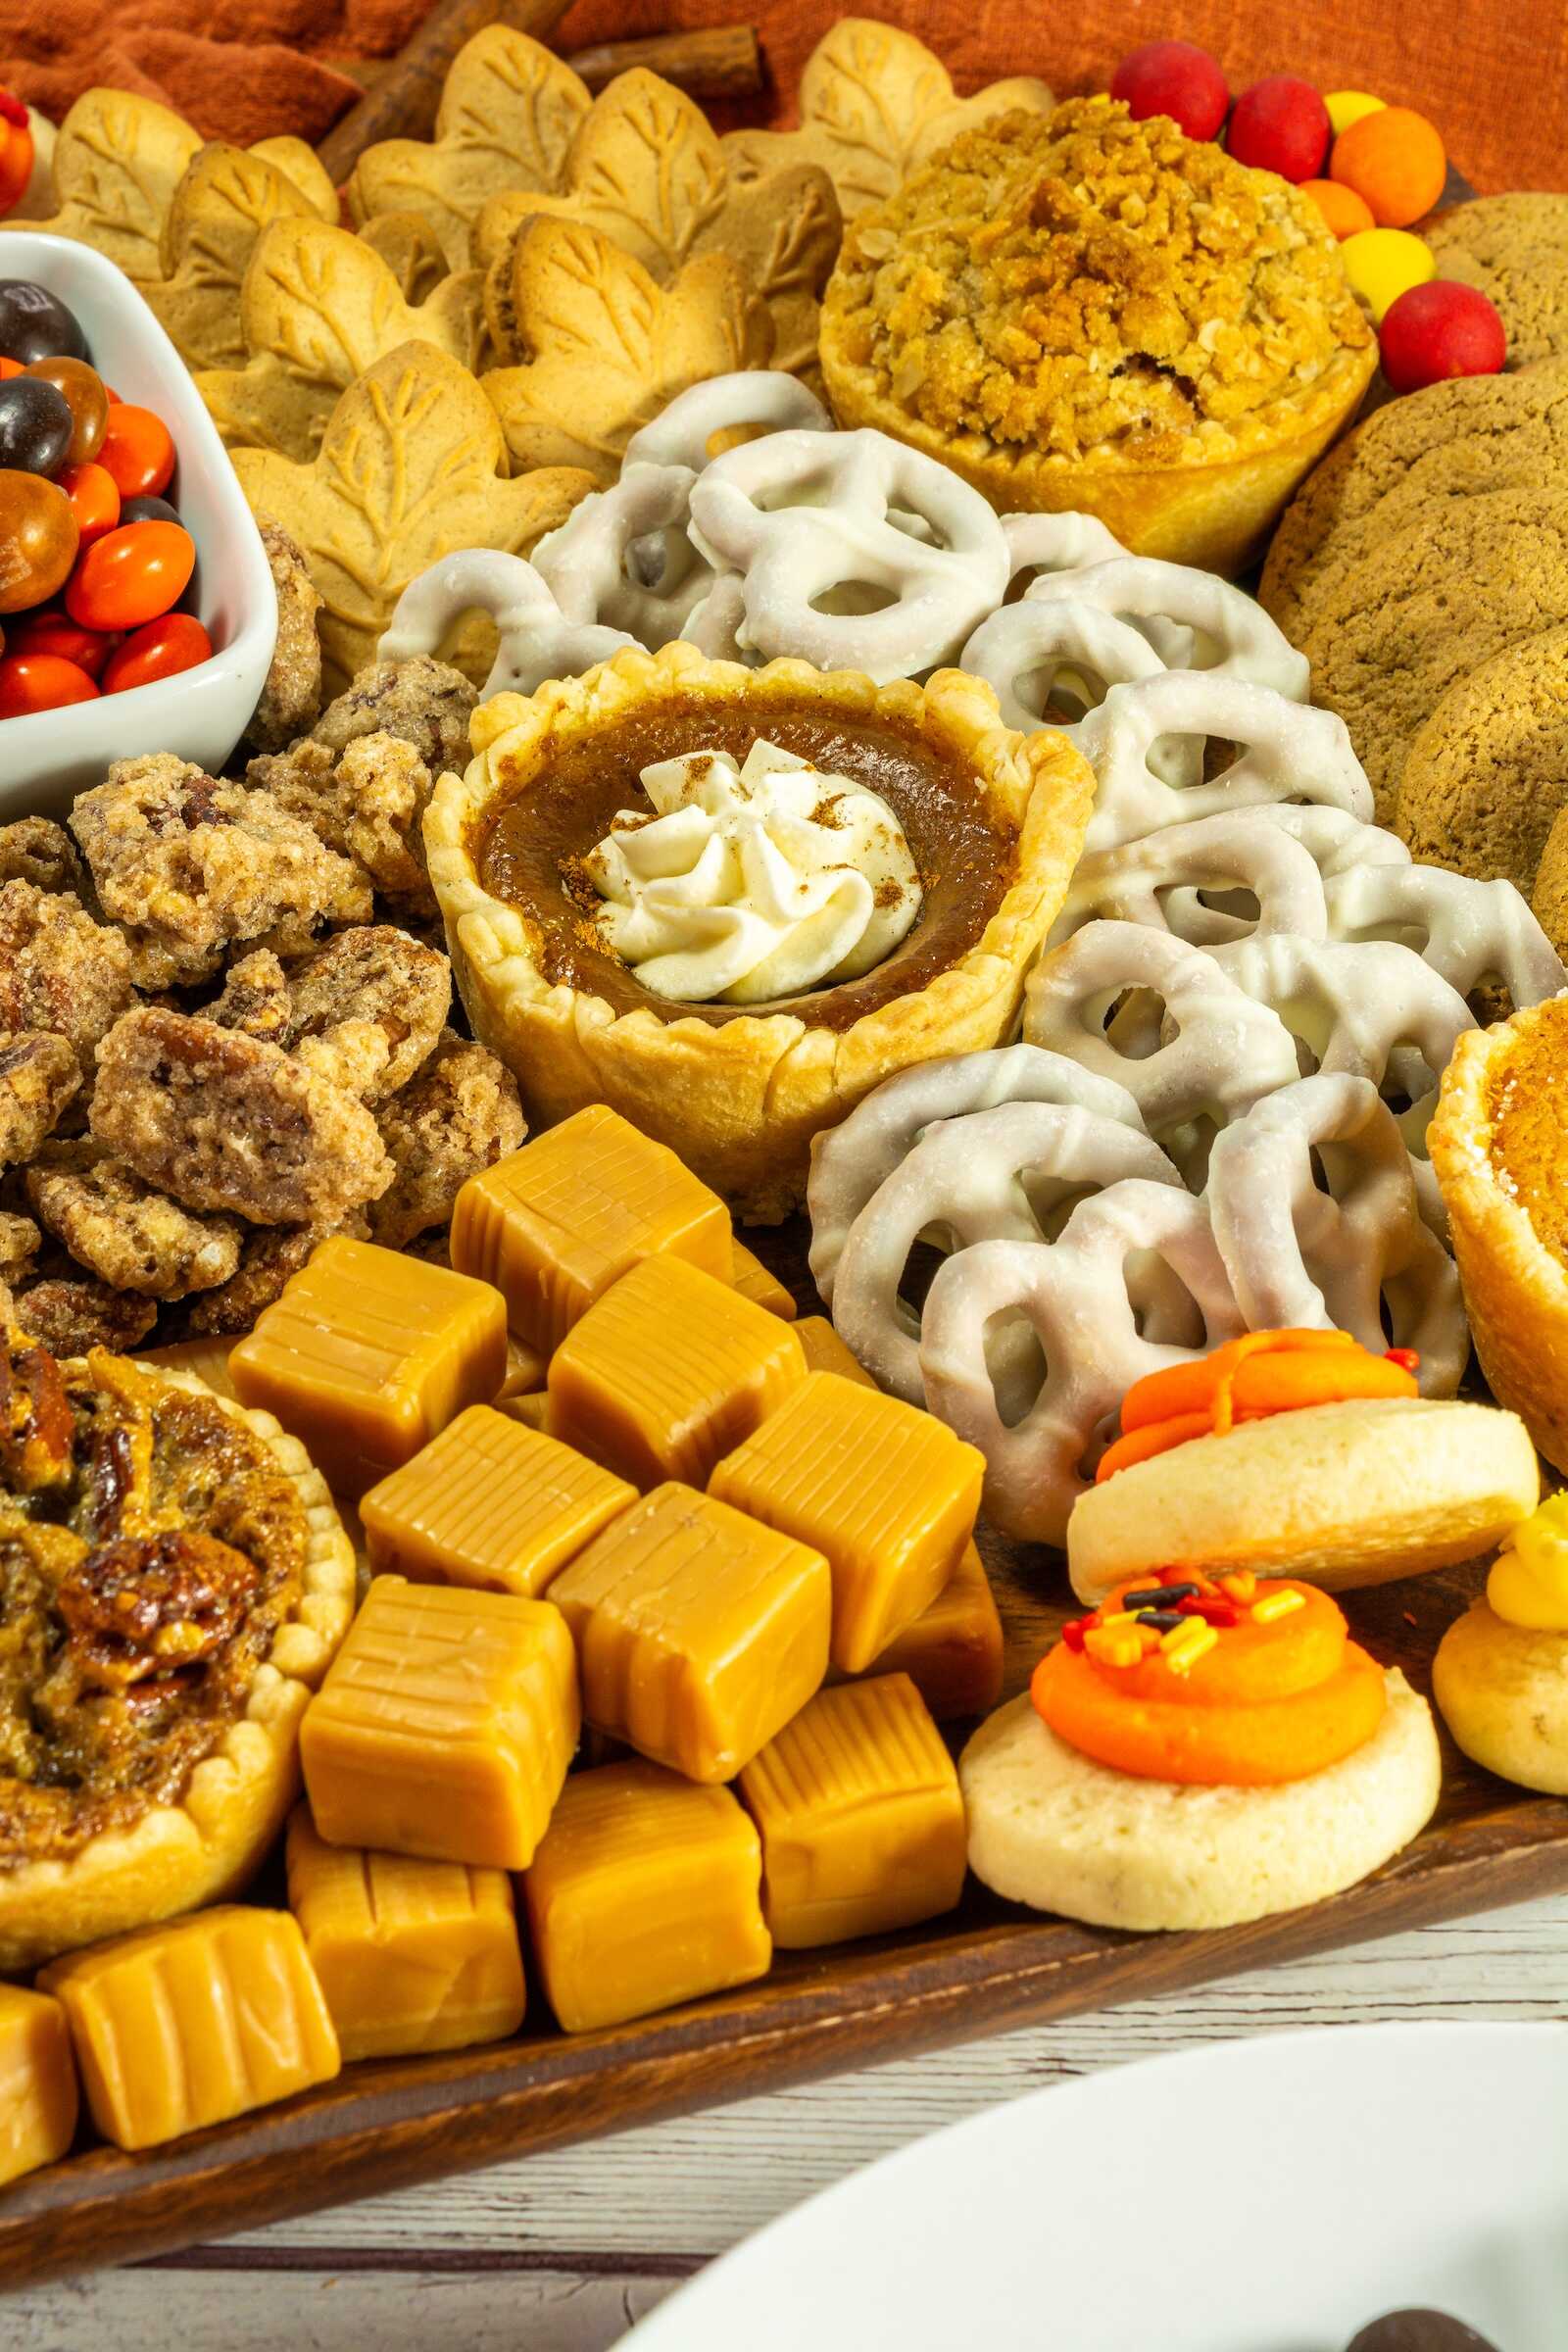
- White chocolate–covered pretzels
- Maple leaf cookies
- Premade sugar cookies (fall colors)
- Chocolate-covered almonds
- Pumpkin-flavored M&M candies

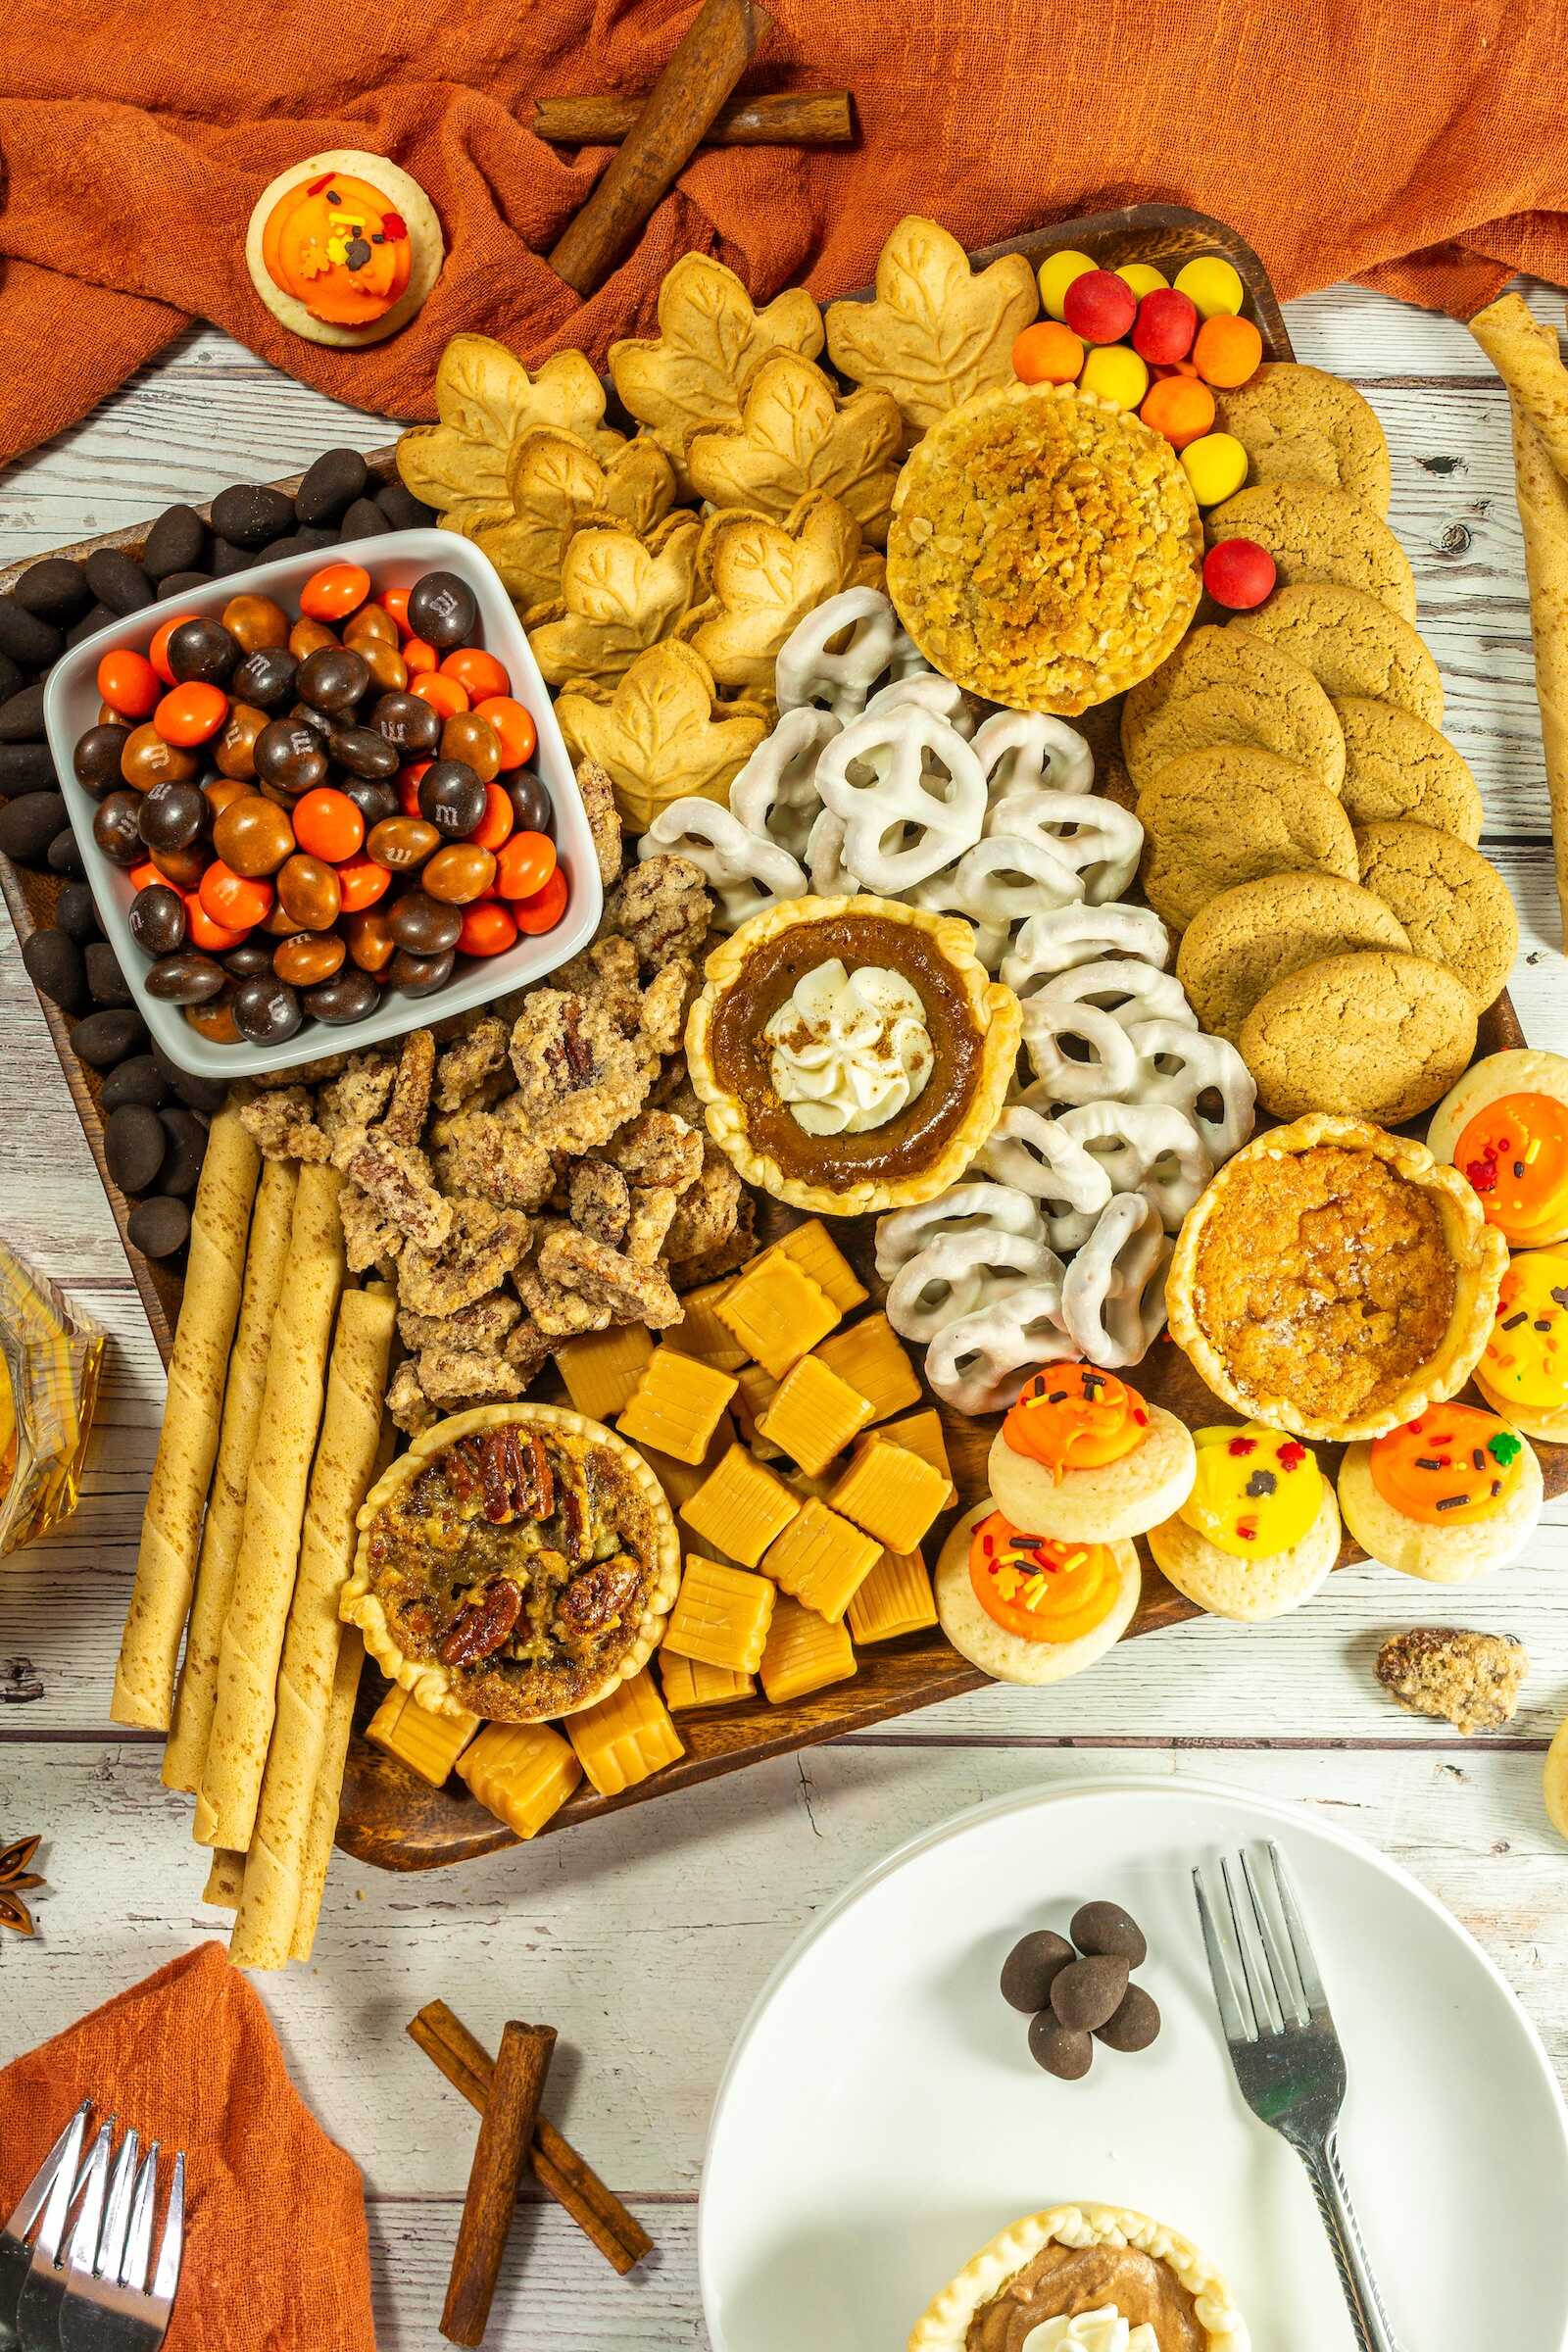
How to Build a Perfect Fall Dessert Board
One of the secrets to a beautiful dessert board is layering textures and arranging items by size—starting with the biggest elements and working your way down to the smallest details. The goal is to make the board look full, colorful, and abundant without feeling chaotic.
Here’s exactly how to do it:
1. Start With Your Board & Liners
Begin by selecting your base. You can use:
- A large wooden charcuterie board
- A serving tray
- A flat platter
- A round lazy Susan for easy spinning
If you want easy cleanup or a little added depth, line the board with parchment paper, brown craft paper, or even crinkled tissue paper in warm fall tones.
Place a small bowl slightly off-center—this will hold your loose candies later and help create a visual anchor on the board.
Why this step matters:
Starting with your board’s layout helps you establish flow. Think of your dessert board like a cozy fall tablescape—your foundation sets the tone.
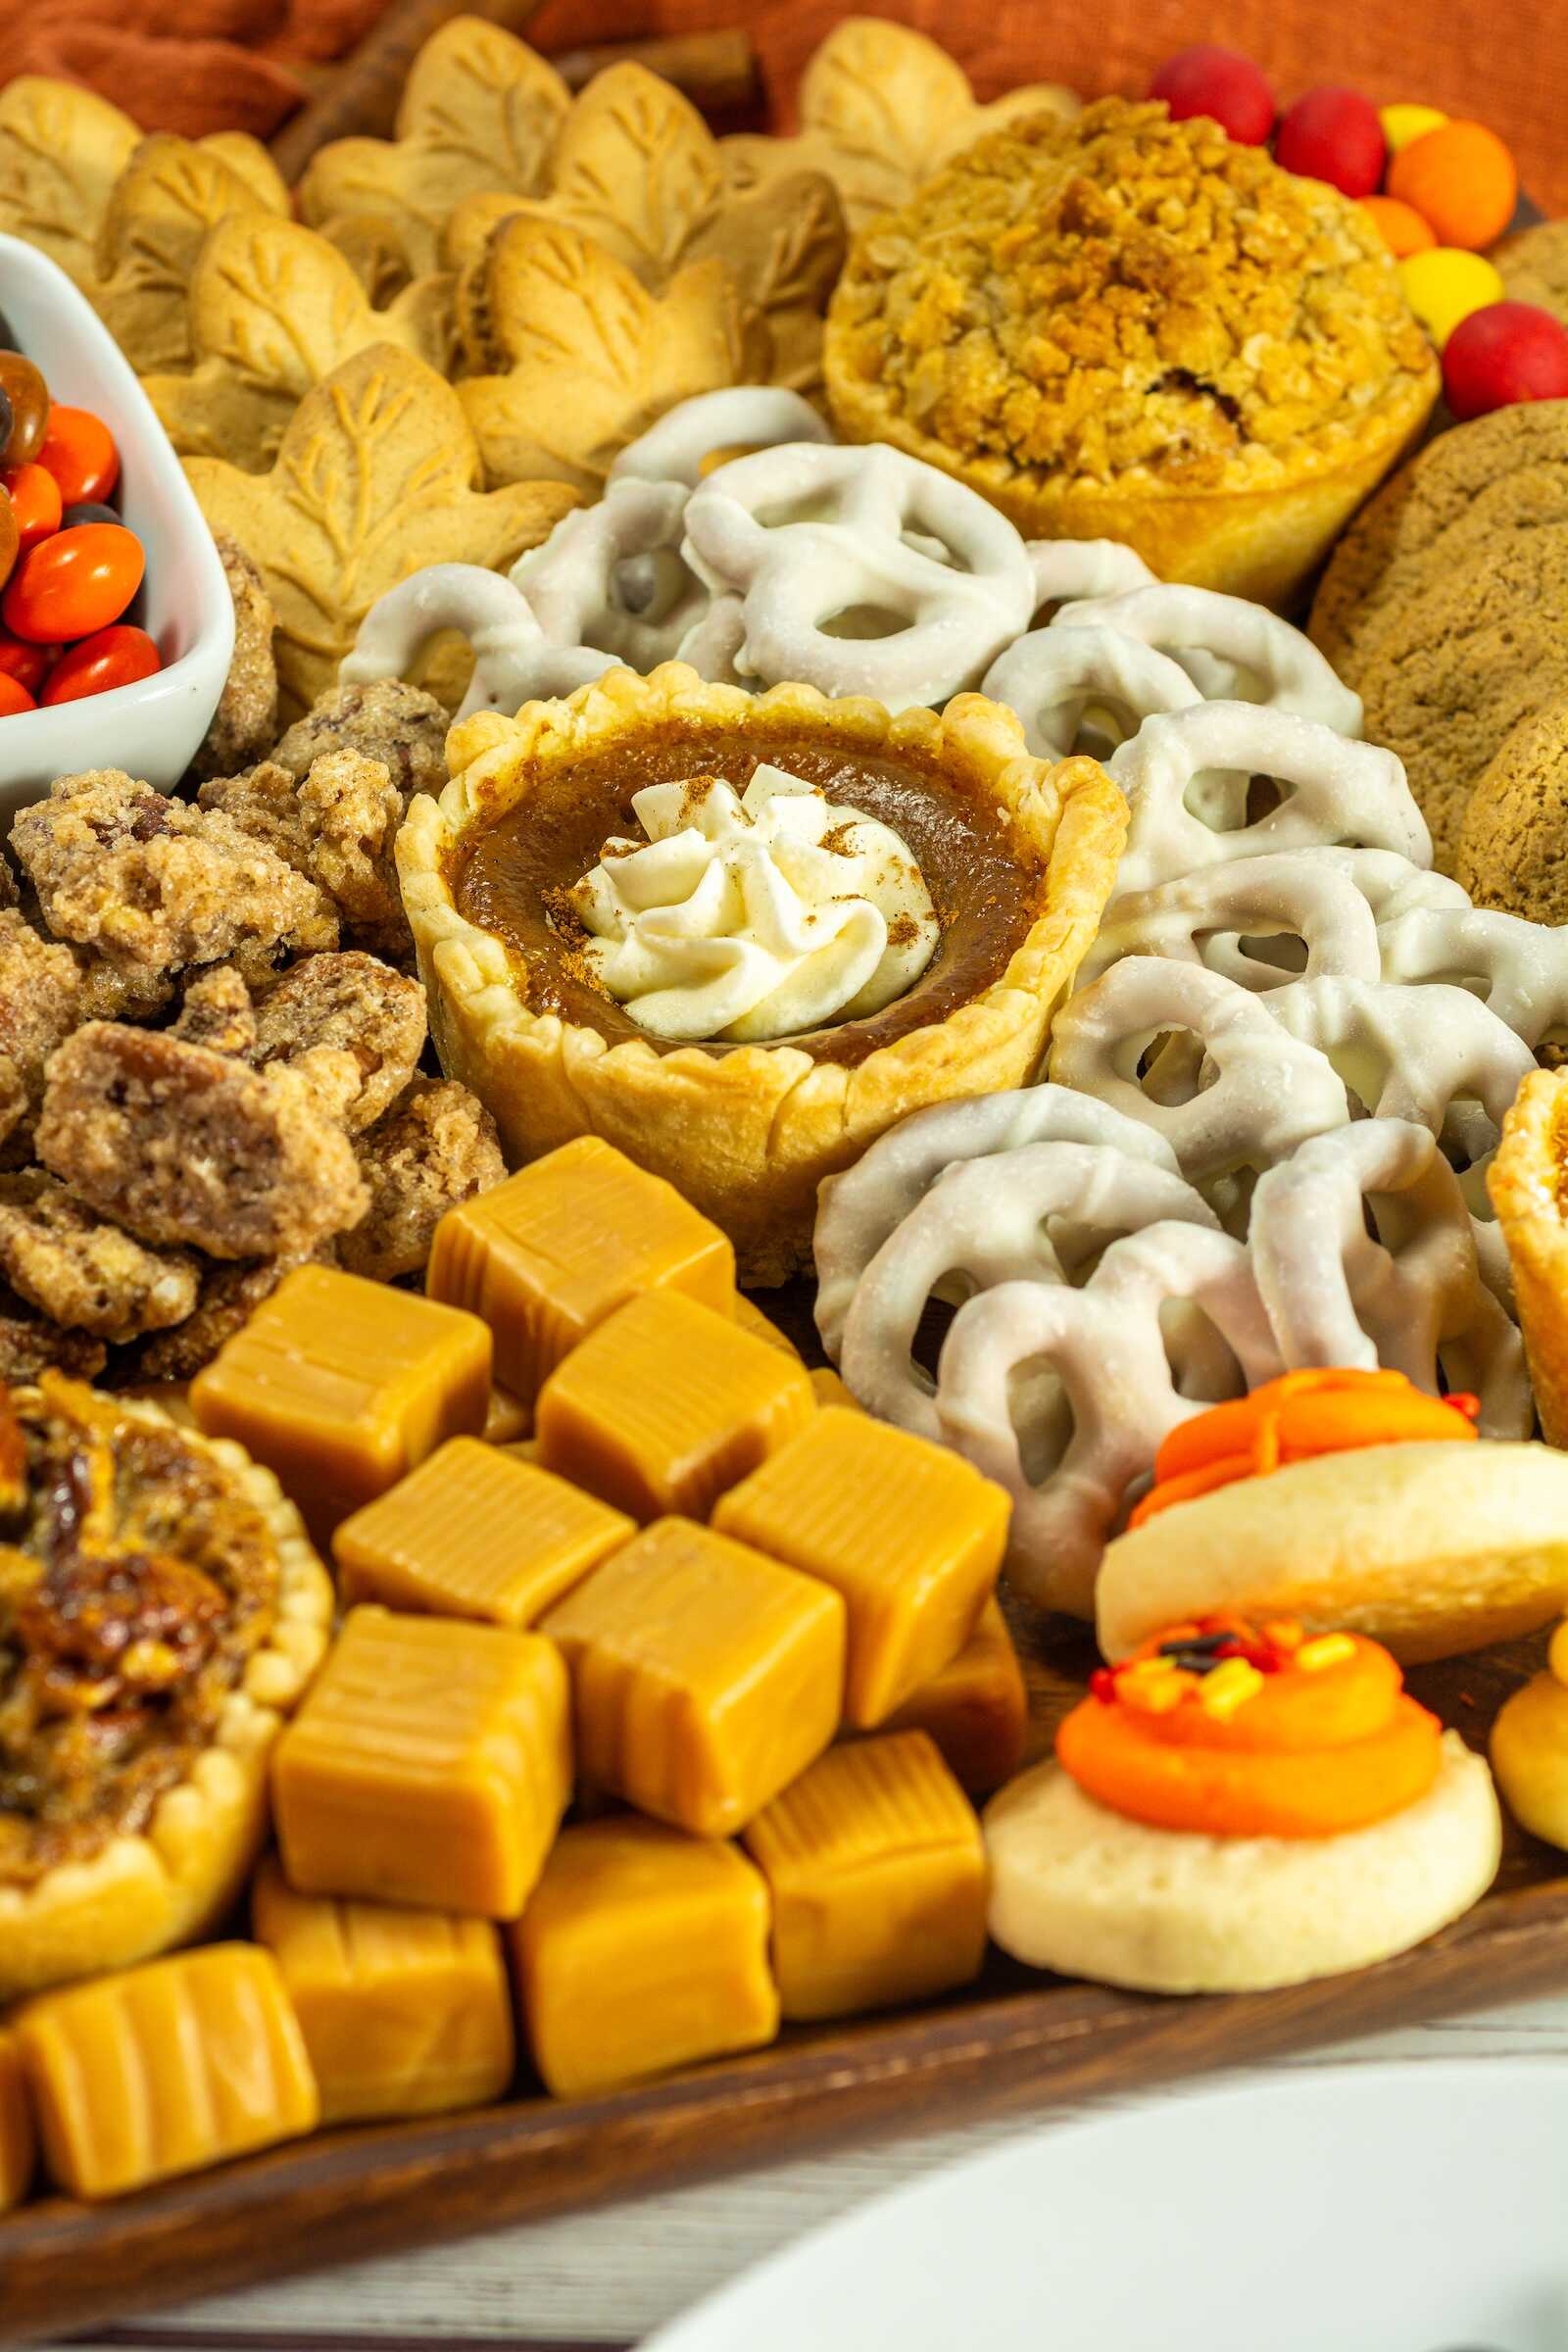
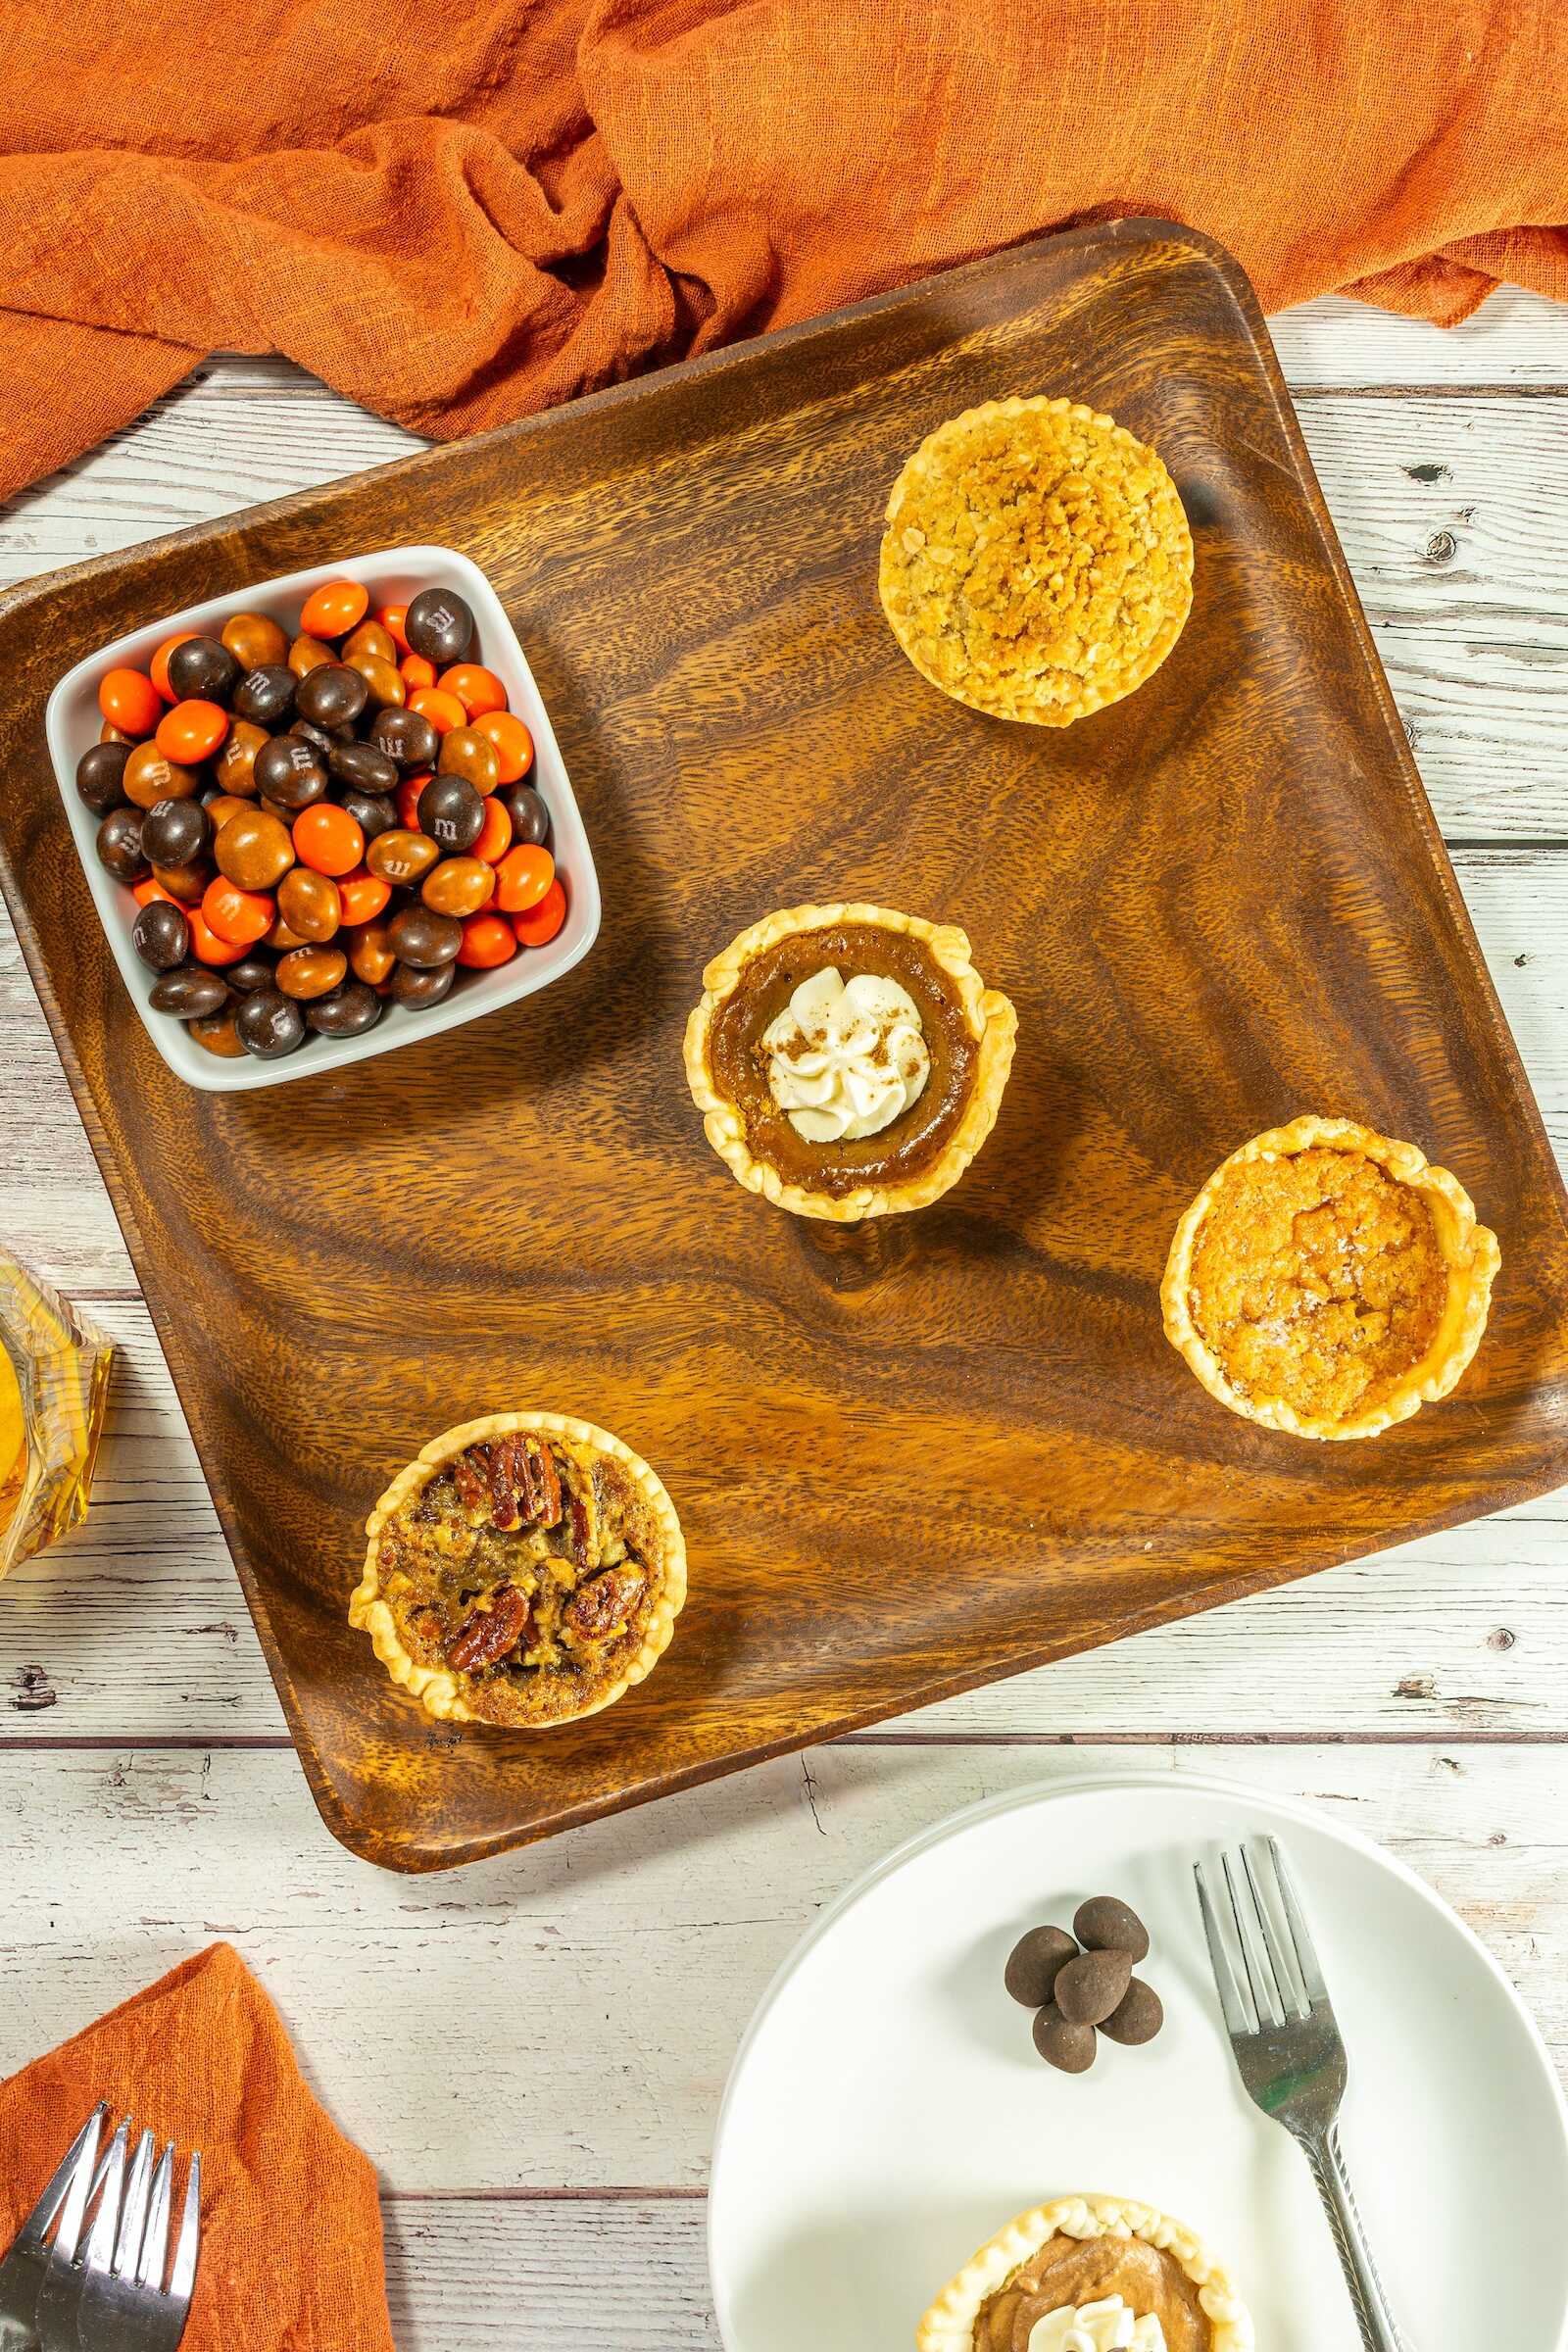
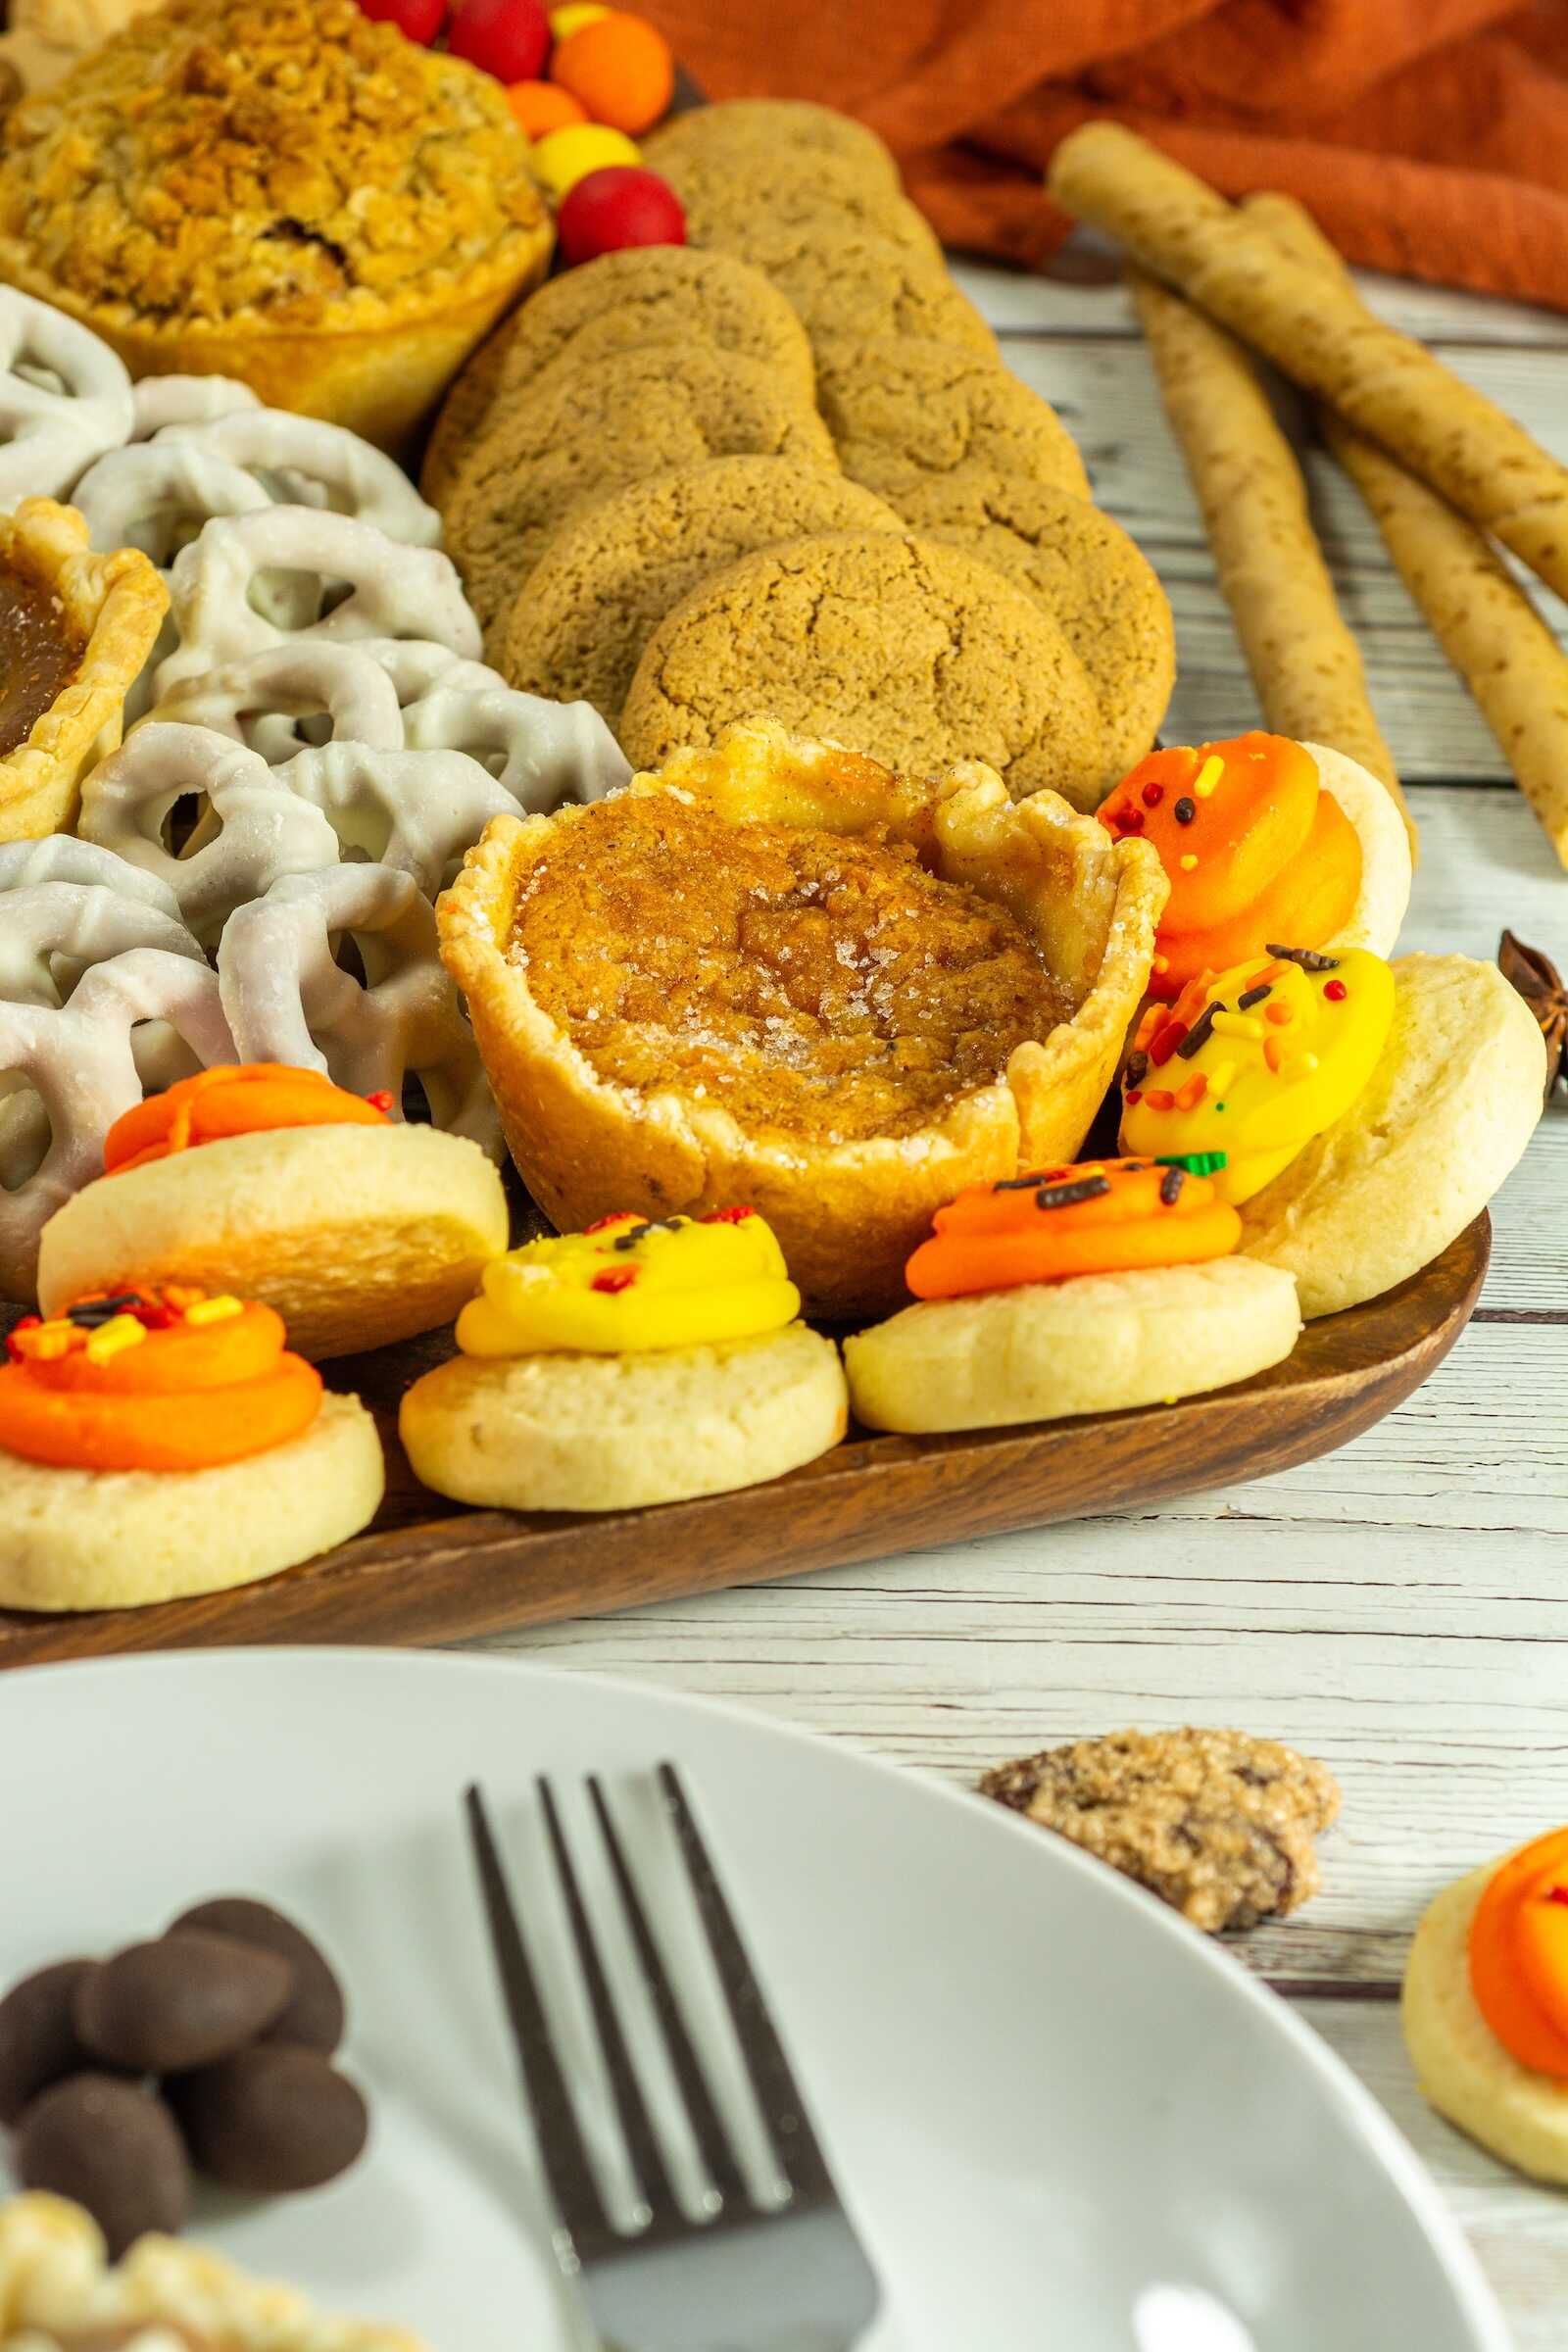
2. Arrange the Mini Pies First
Mini pies are the stars of your fall dessert board. The contrast of pumpkin orange, pecan brown, and Dutch apple golden tones instantly brings fall to the table.
Arrange them around the board, spacing them evenly so each flavor has its own “moment.”
Keep each style separate to highlight their visual differences:
- Pumpkin pie’s warm orange
- Pecan pie’s glossy, caramelized top
- Dutch apple’s crumble
- Sweet potato’s deep amber
- Chocolate silk’s rich brown center
Pro Styling Tip:
Odd numbers are more visually appealing—use three of each style whenever possible.
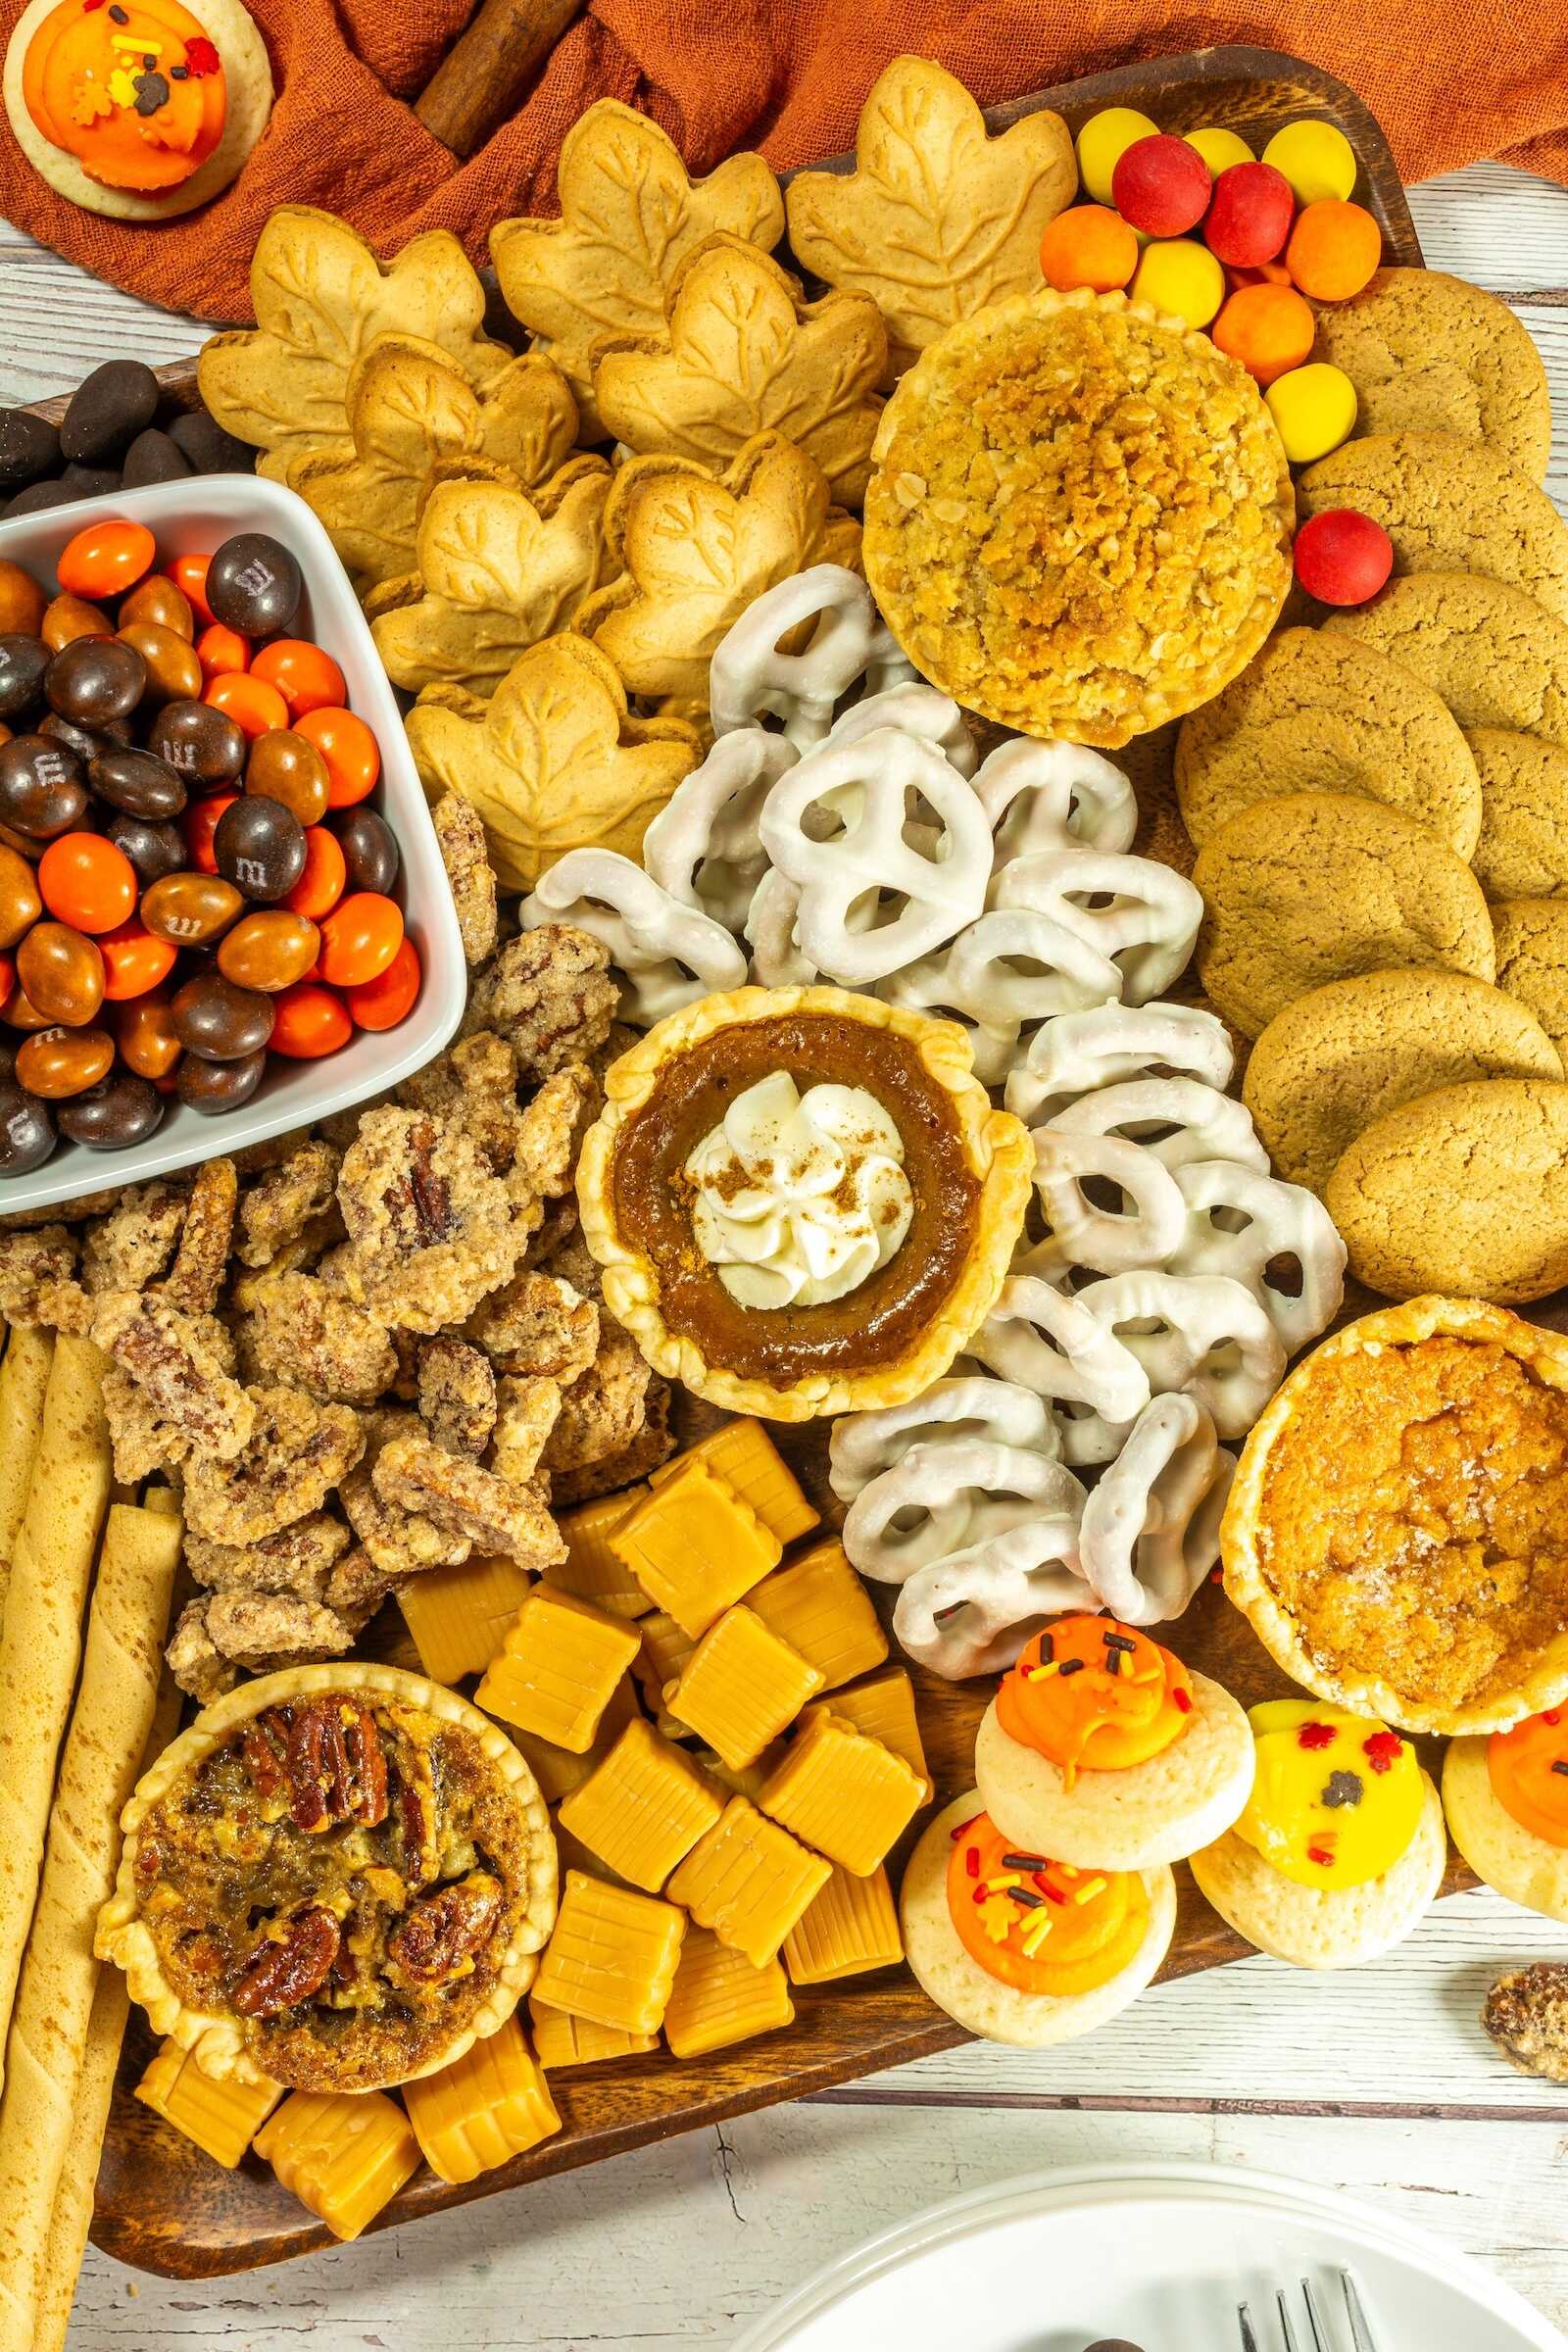
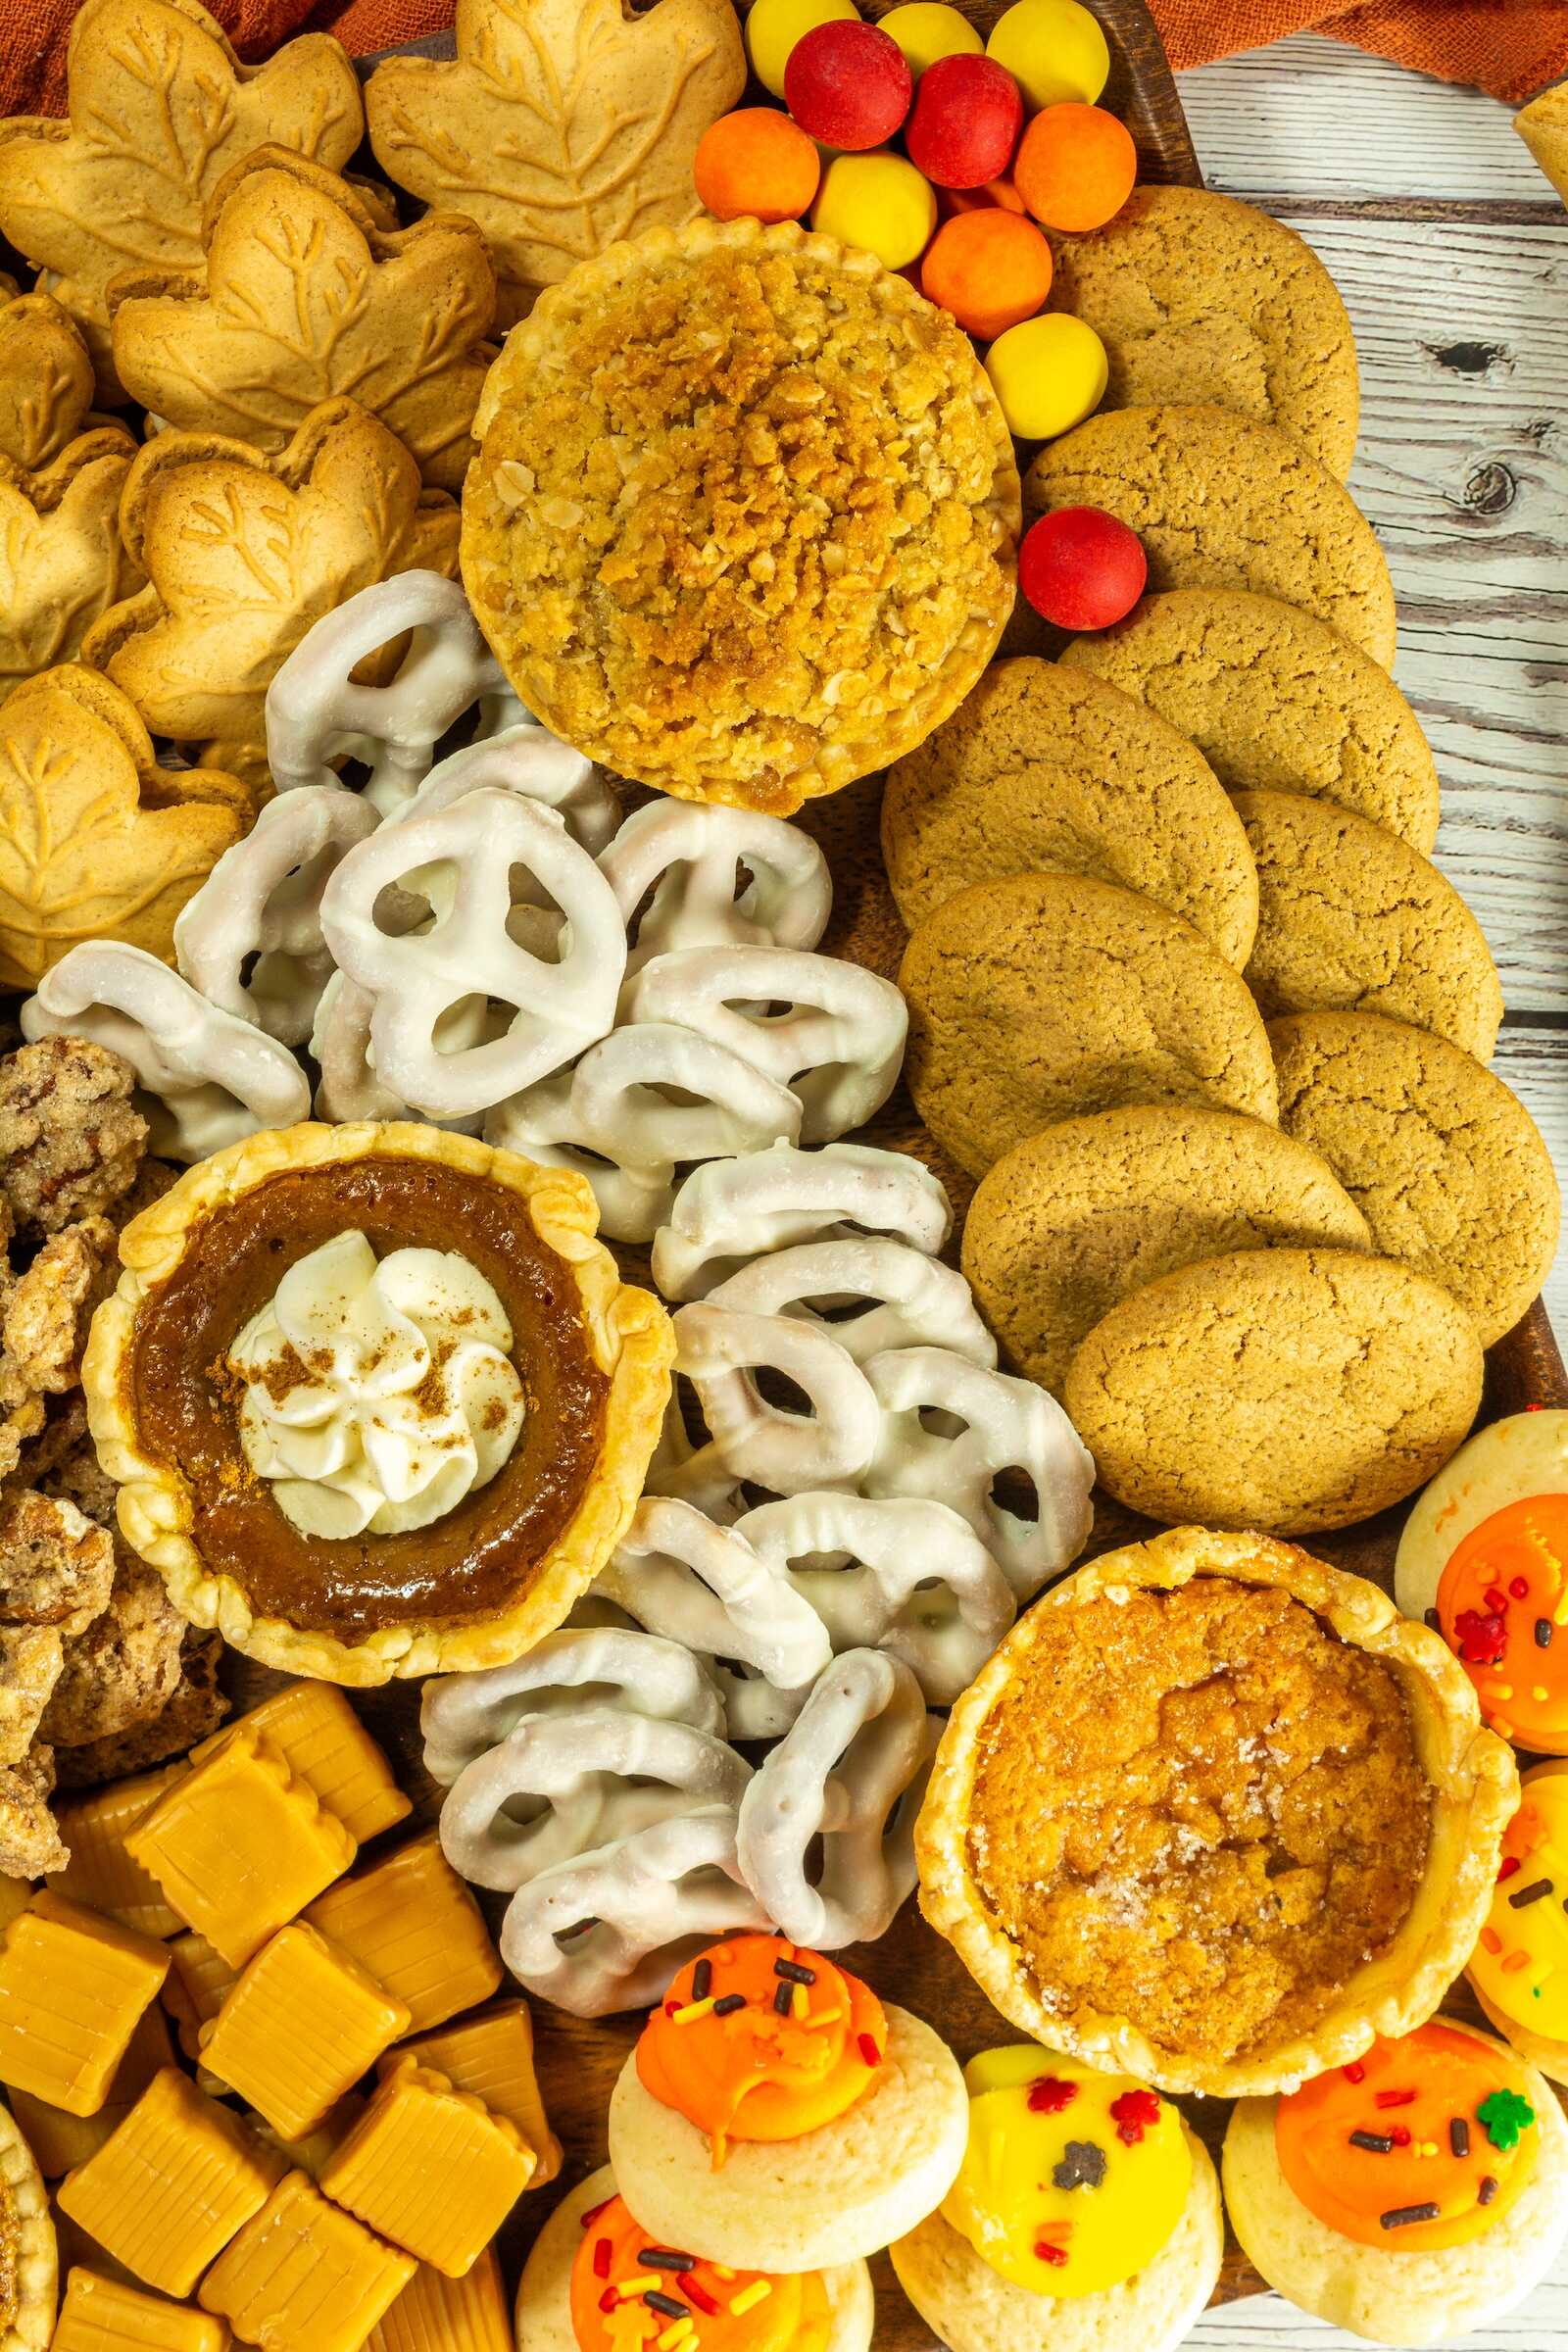
3. Add the Larger Cookie Elements
Your cookies add structure, symmetry, and shape. Start building outward.
Maple Leaf Cookies
Fan these along one side to create a full, dramatic border. Their iconic leaf shape instantly reads “fall,” making them the perfect statement piece.
Gingersnap Cookies
Stack them in a crescent shape on the opposite side for balance. The warm cinnamon color deepens the autumn palette and adds crunch.
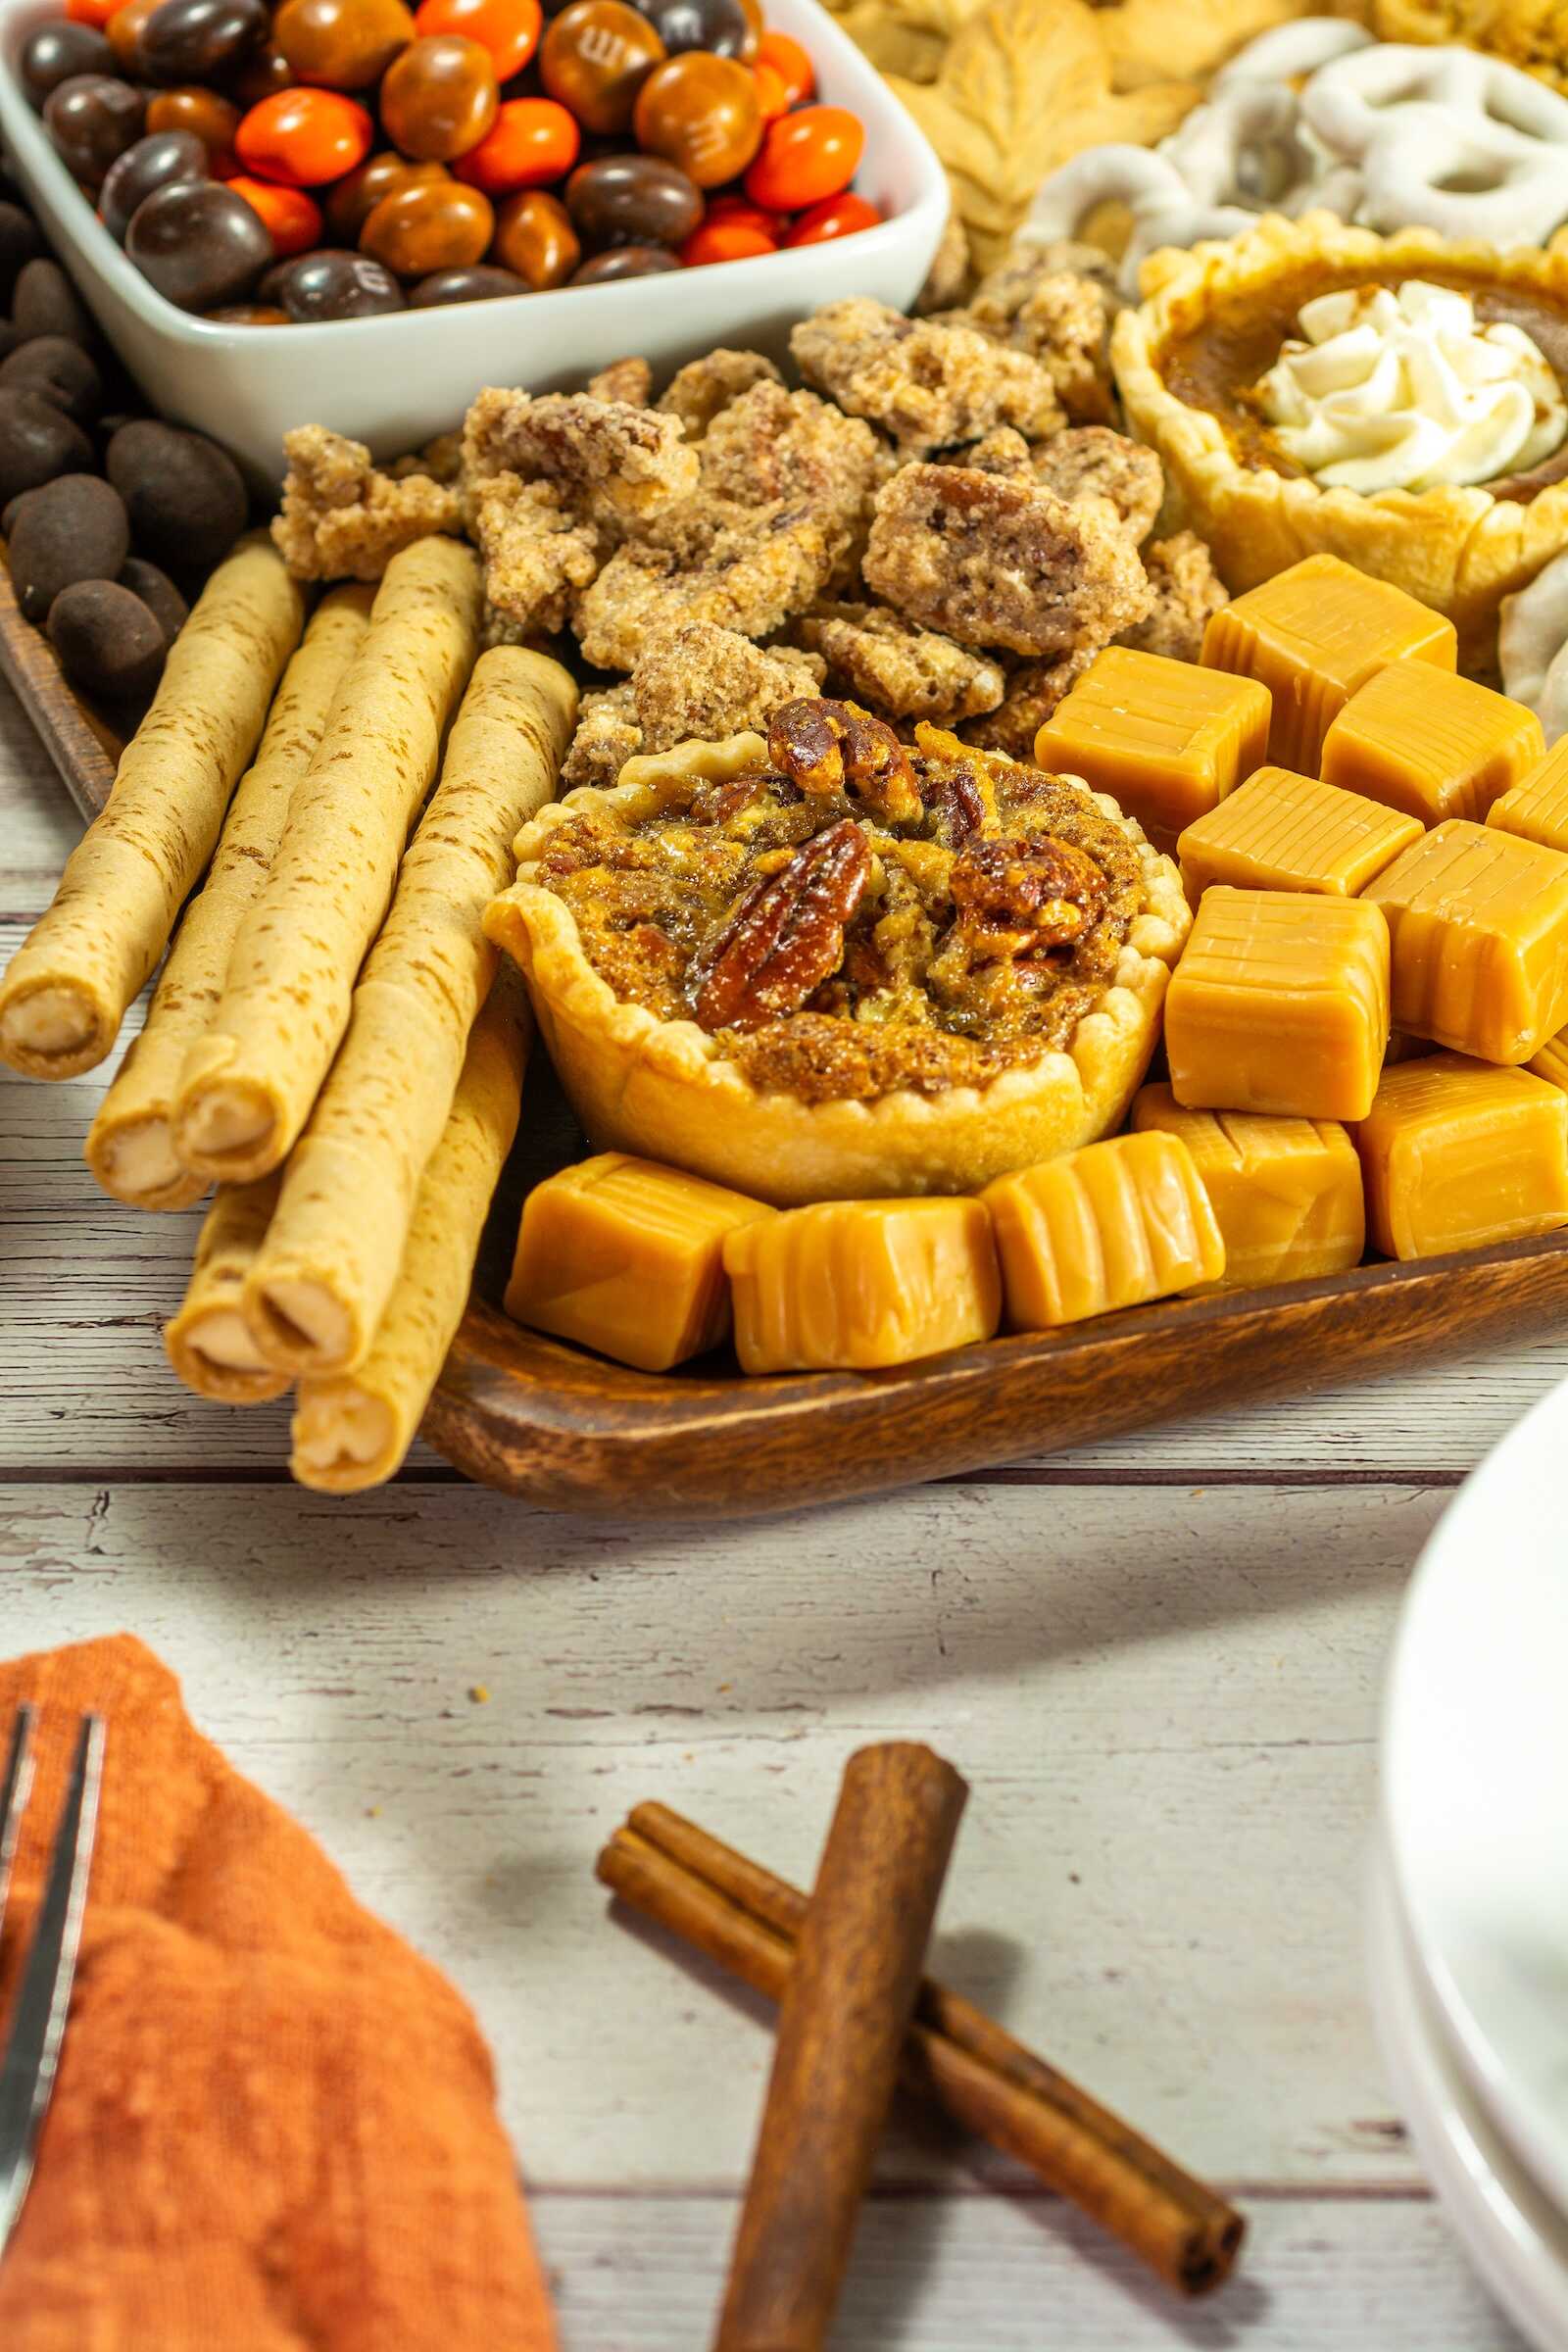
Pirouette Cookies
Pirouettes add height and texture. You can:
- Stand them upright in a bundle
- Lay them horizontally as a tall accent
- Arrange them diagonally for visual movement
Why this works:
Large cookies act like your “furniture”—they define the board’s shape and keep smaller, loose items from spilling inward.
4. Fill In With Mid-Sized Treats
Now it’s time to work inward toward the center, filling in with medium-size items.
Candied Pecans
Cluster them around the pies or cookies. Their glossy finish adds sparkle and warmth. They’re also a perfect transitional element between large cookies and small candies.
Sugar Cookies (Fall Colors)
Use 3–5 decorated cookies for pops of bright orange, yellow, or white. Their bold colors help break up the browns and golds of the pies and pecans.
Design Strategy:
Think of these as your “accent pillows”—you don’t need many, but they add personality and vibrancy.
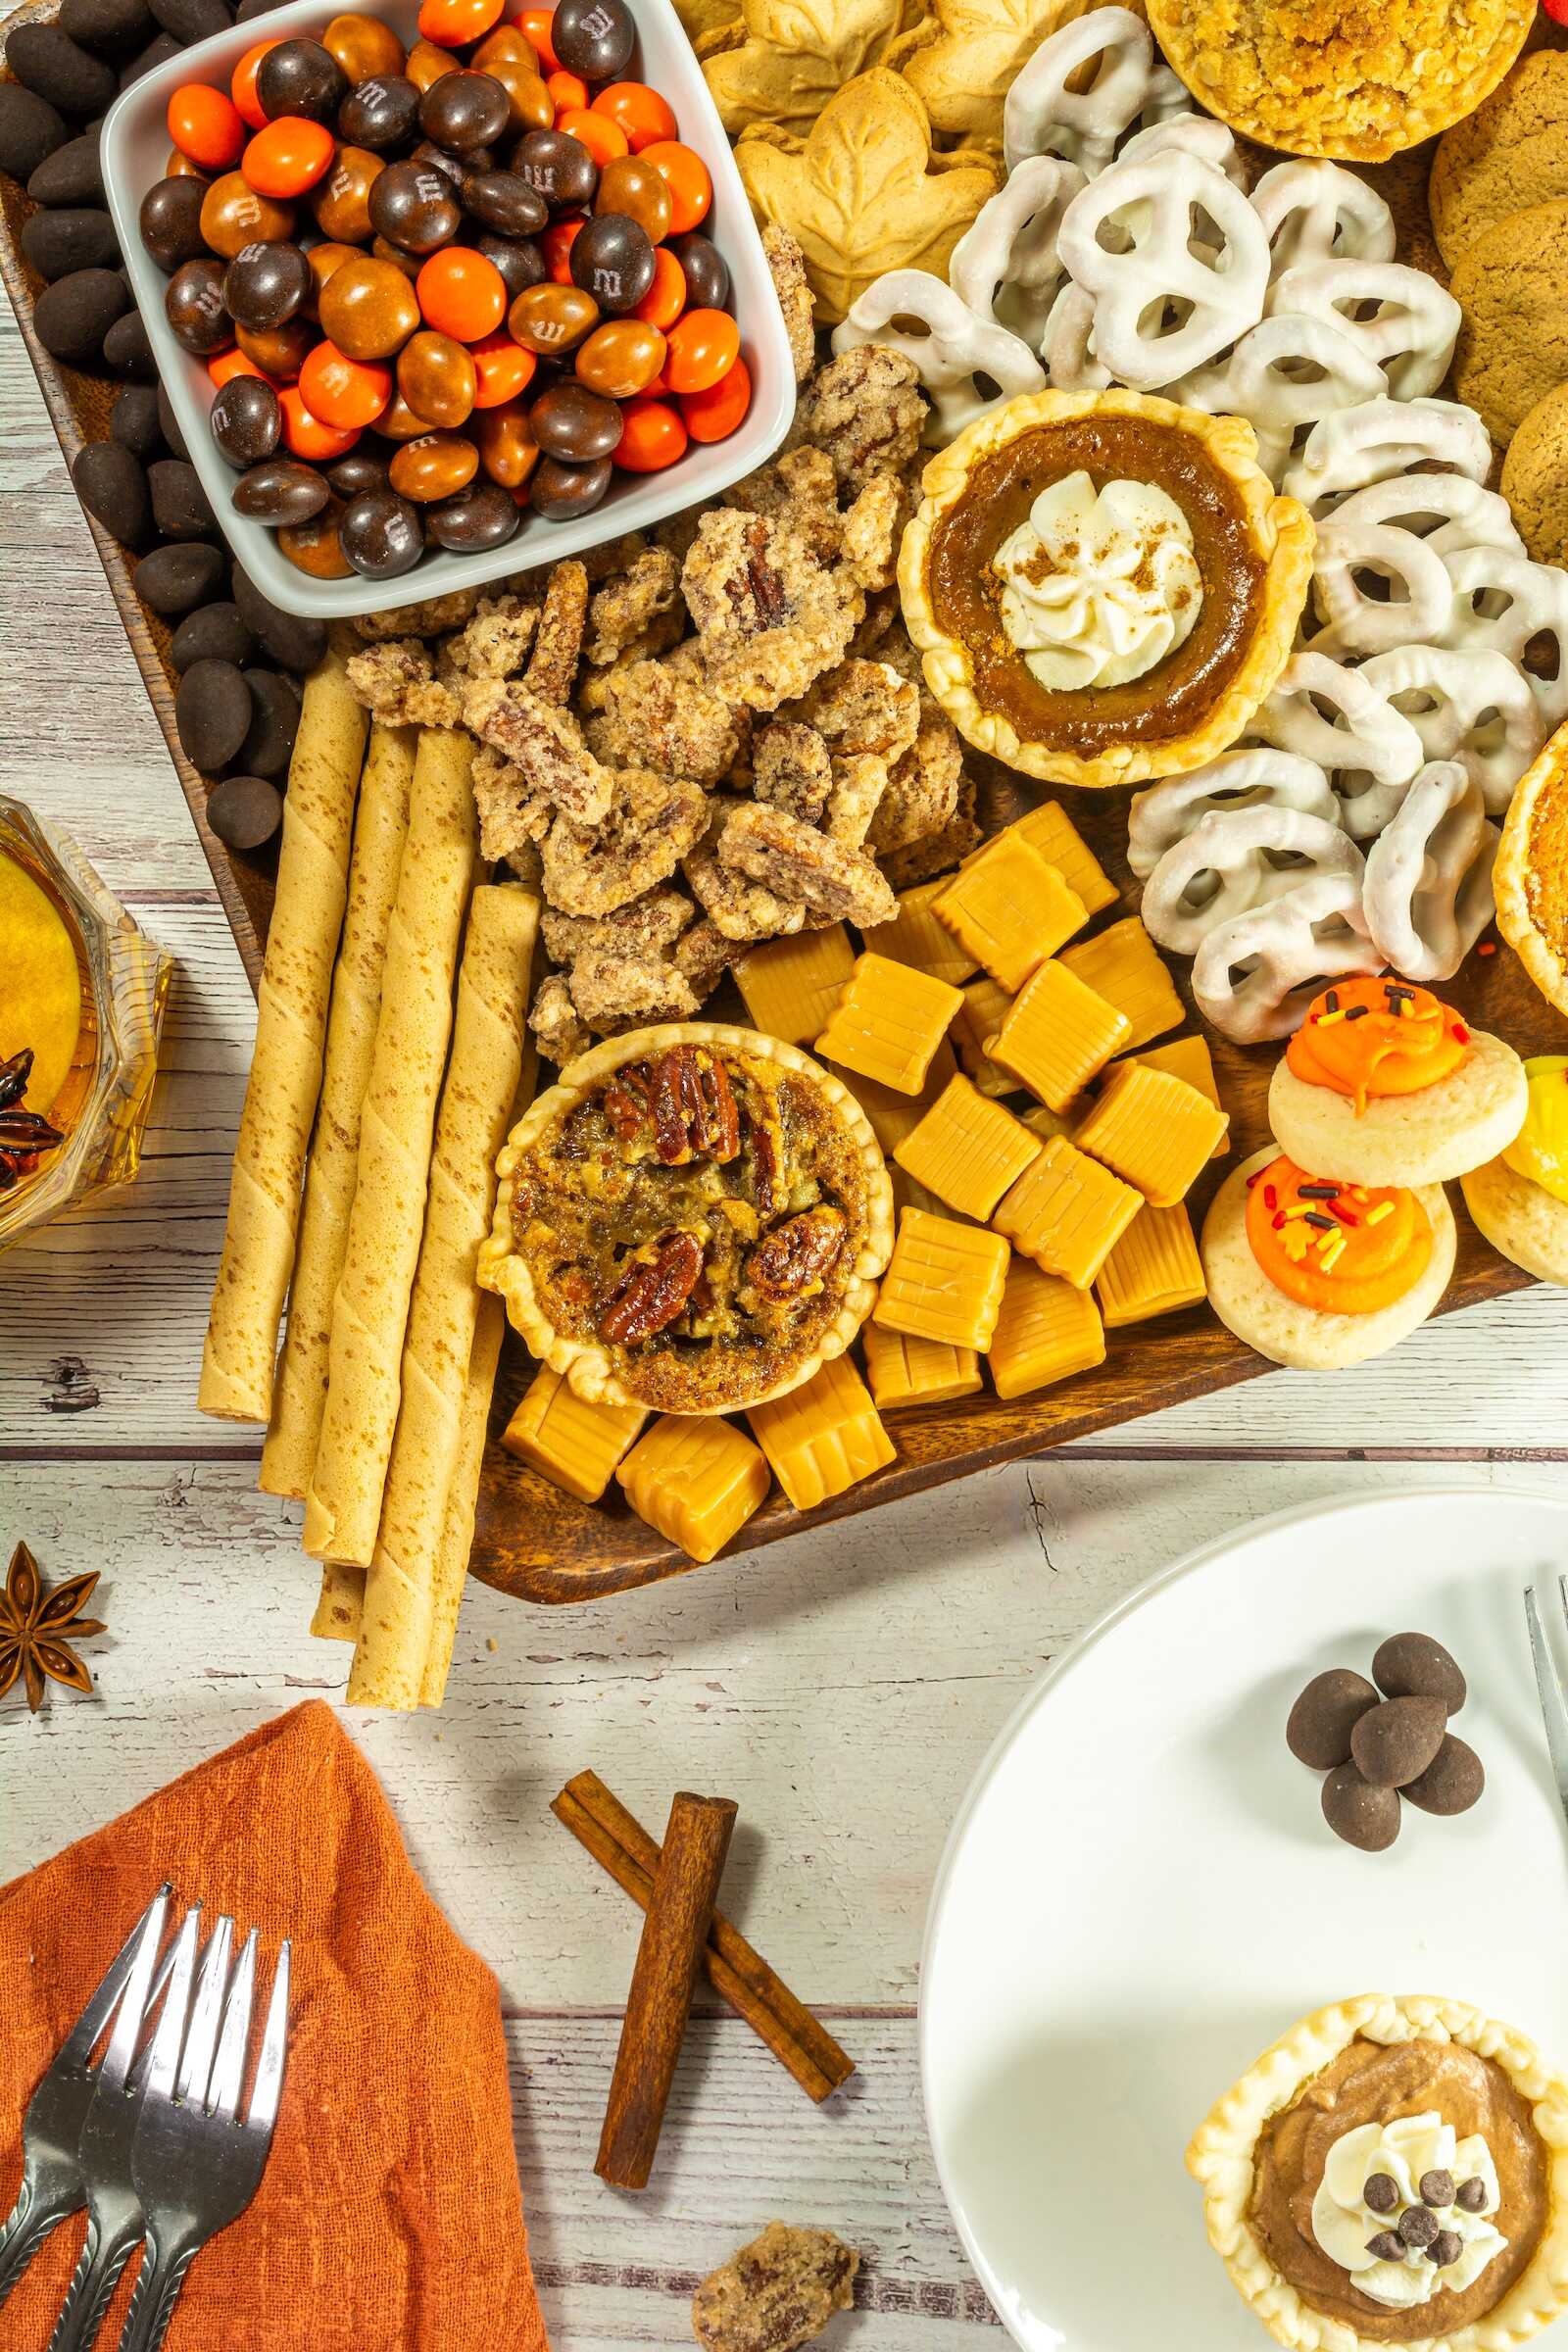
5. Add the Candies
Candy will bring your board to life. This is where color, playfulness, and irresistible sweetness truly shine.
Pour each style of candy into its own mini pile or bowl:
- Cadbury fall-colored chocolates
- Pumpkin-flavored M&Ms
- Reese’s Pieces
- Soft caramel candies
- Chocolate-covered almonds
Use your center bowl for the smaller candies like Reese’s Pieces or M&Ms.
Scatter a few clusters around the pies and cookies—not too messy, just enough to create a sense of abundance.
Pro Tip:
Use candies to fill any gaps or awkward spaces. They act like edible confetti and tie the entire board together.
Tips for a Gorgeous, Eye-Catching Fall Dessert Board
Creating a dessert board is more about styling than cooking. Here’s how to make yours look irresistibly beautiful every time:
Choose a Warm Fall Color Palette
Stick to the timeless autumn hues:
- Burnt orange
- Deep browns
- Maple gold
- Creamy whites
- Cranberry red
When you keep the palette cohesive, your board instantly looks intentional and professional.
Vary Your Textures
Great boards aren’t flat—they’re textural masterpieces.
Include:
- Crunchy (gingersnaps, maple cookies)
- Soft (mini pies, caramels)
- Smooth (pretzels, chocolate candies)
- Nutty (pecans, almonds)
Texture adds interest and keeps the board from looking visually monotone.
Create Height for Dimension
Use small bowls, stacked cookies, or upright Pirouettes to build vertical layers. Height makes the board feel more bountiful and adds that “WOW” factor.
Stick to Clusters Instead of Mixing Everything Together
Dessert boards look best when each food item has its own dedicated space. This helps:
- Keep colors bold
- Prevent flavors from blending accidentally
- Make it easier for guests to identify what they’re grabbing
Neat clusters also mimic the look of styled grazing platters you see on Pinterest.
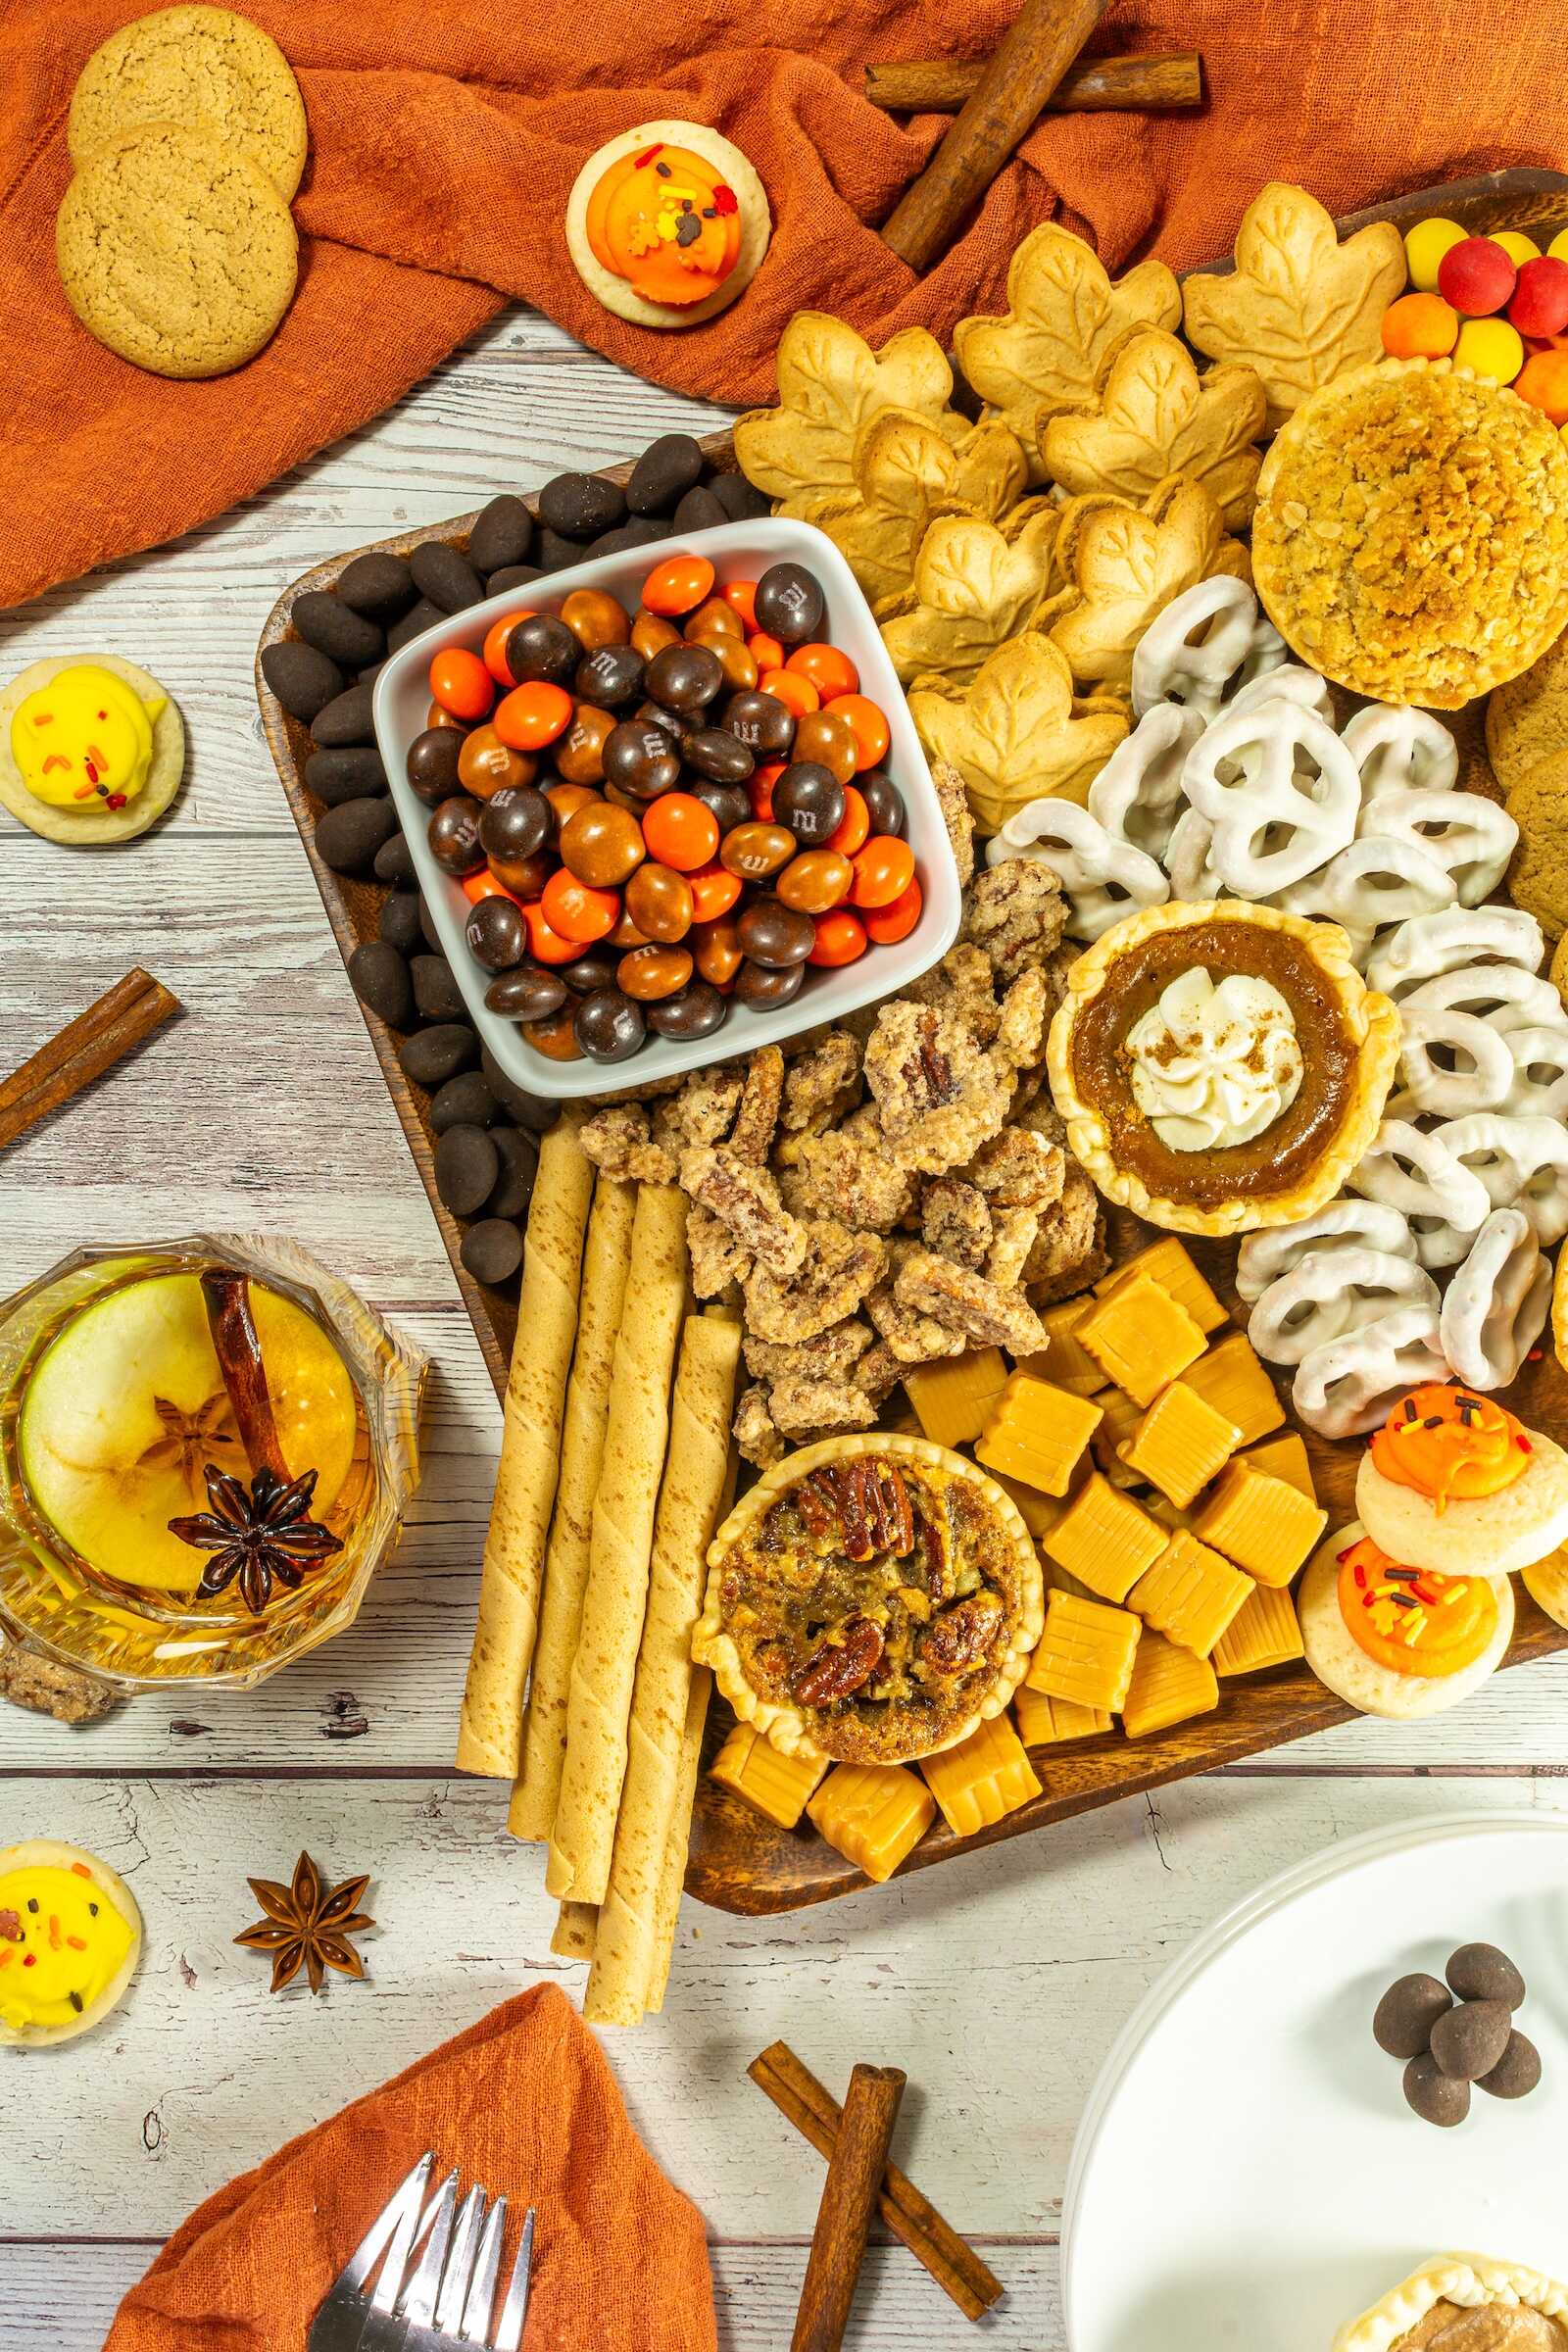
Use Seasonal Decorations (Optional but Beautiful!)
Want to elevate the board even further? Add tiny non-edible fall accents around the edges:
- Mini pumpkins
- Acorns
- Faux leaves
- Cinnamon sticks
- A fall-themed dish towel underneath
Just be sure decorations stay outside of the edible areas.
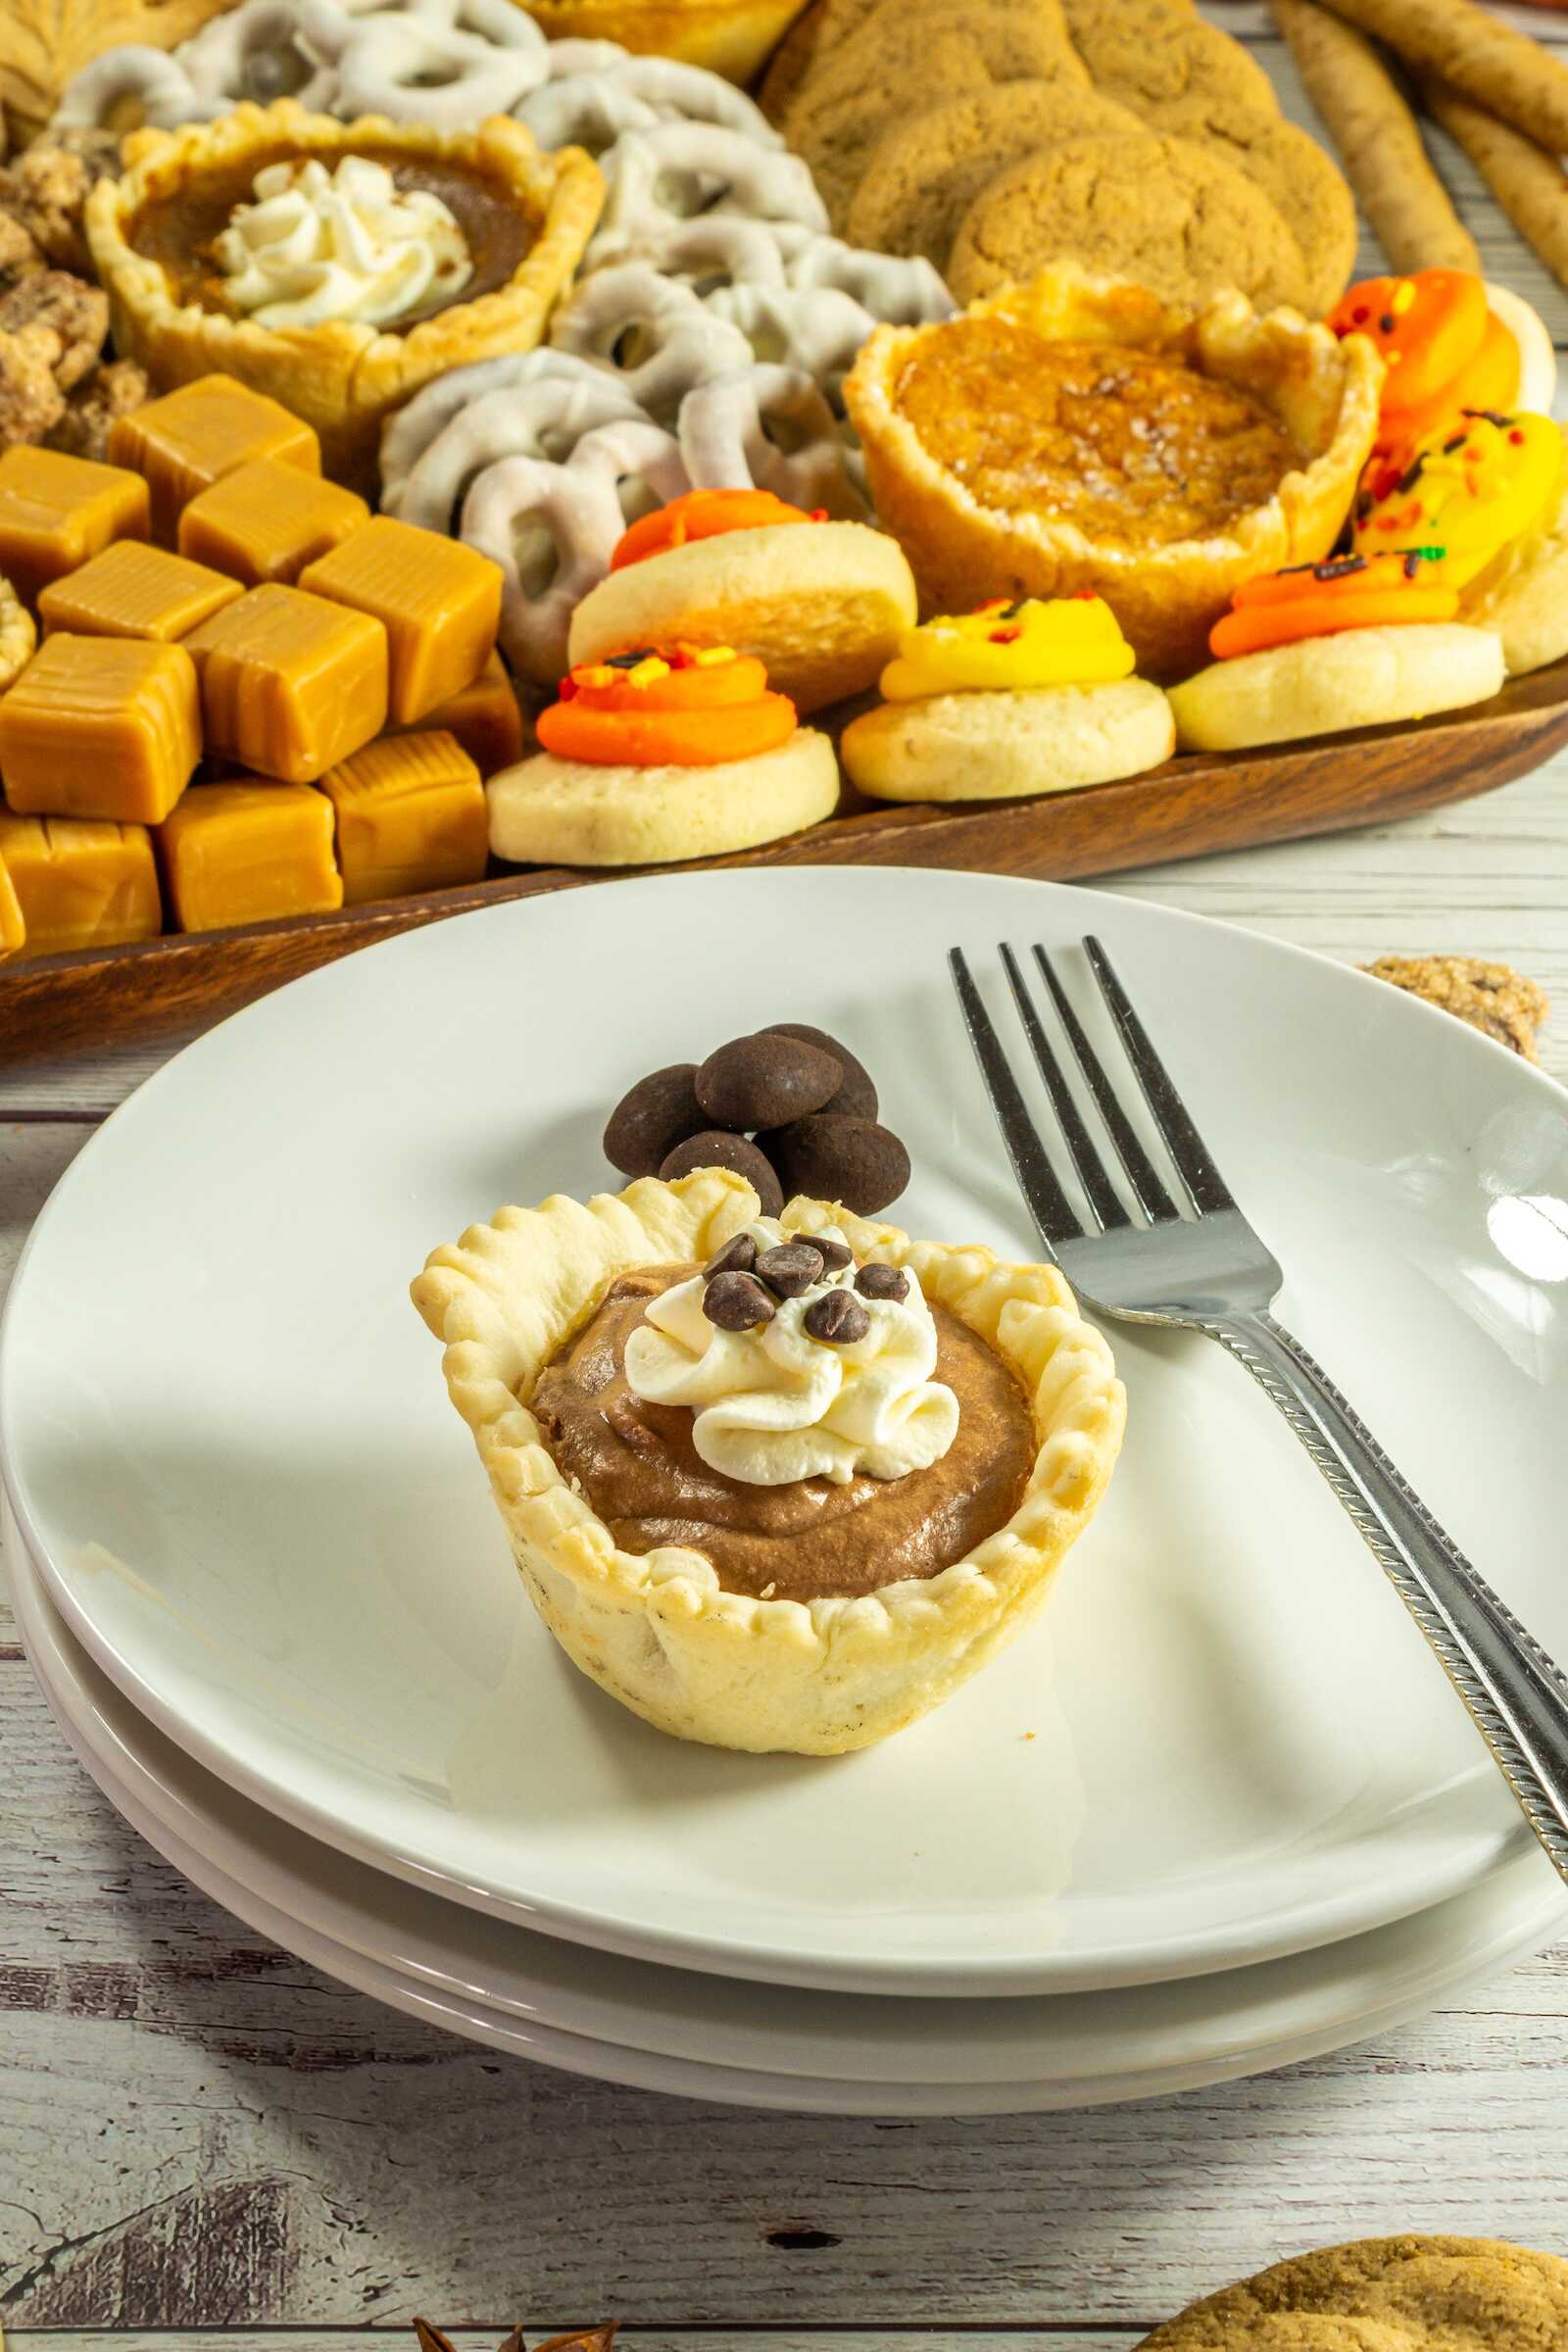
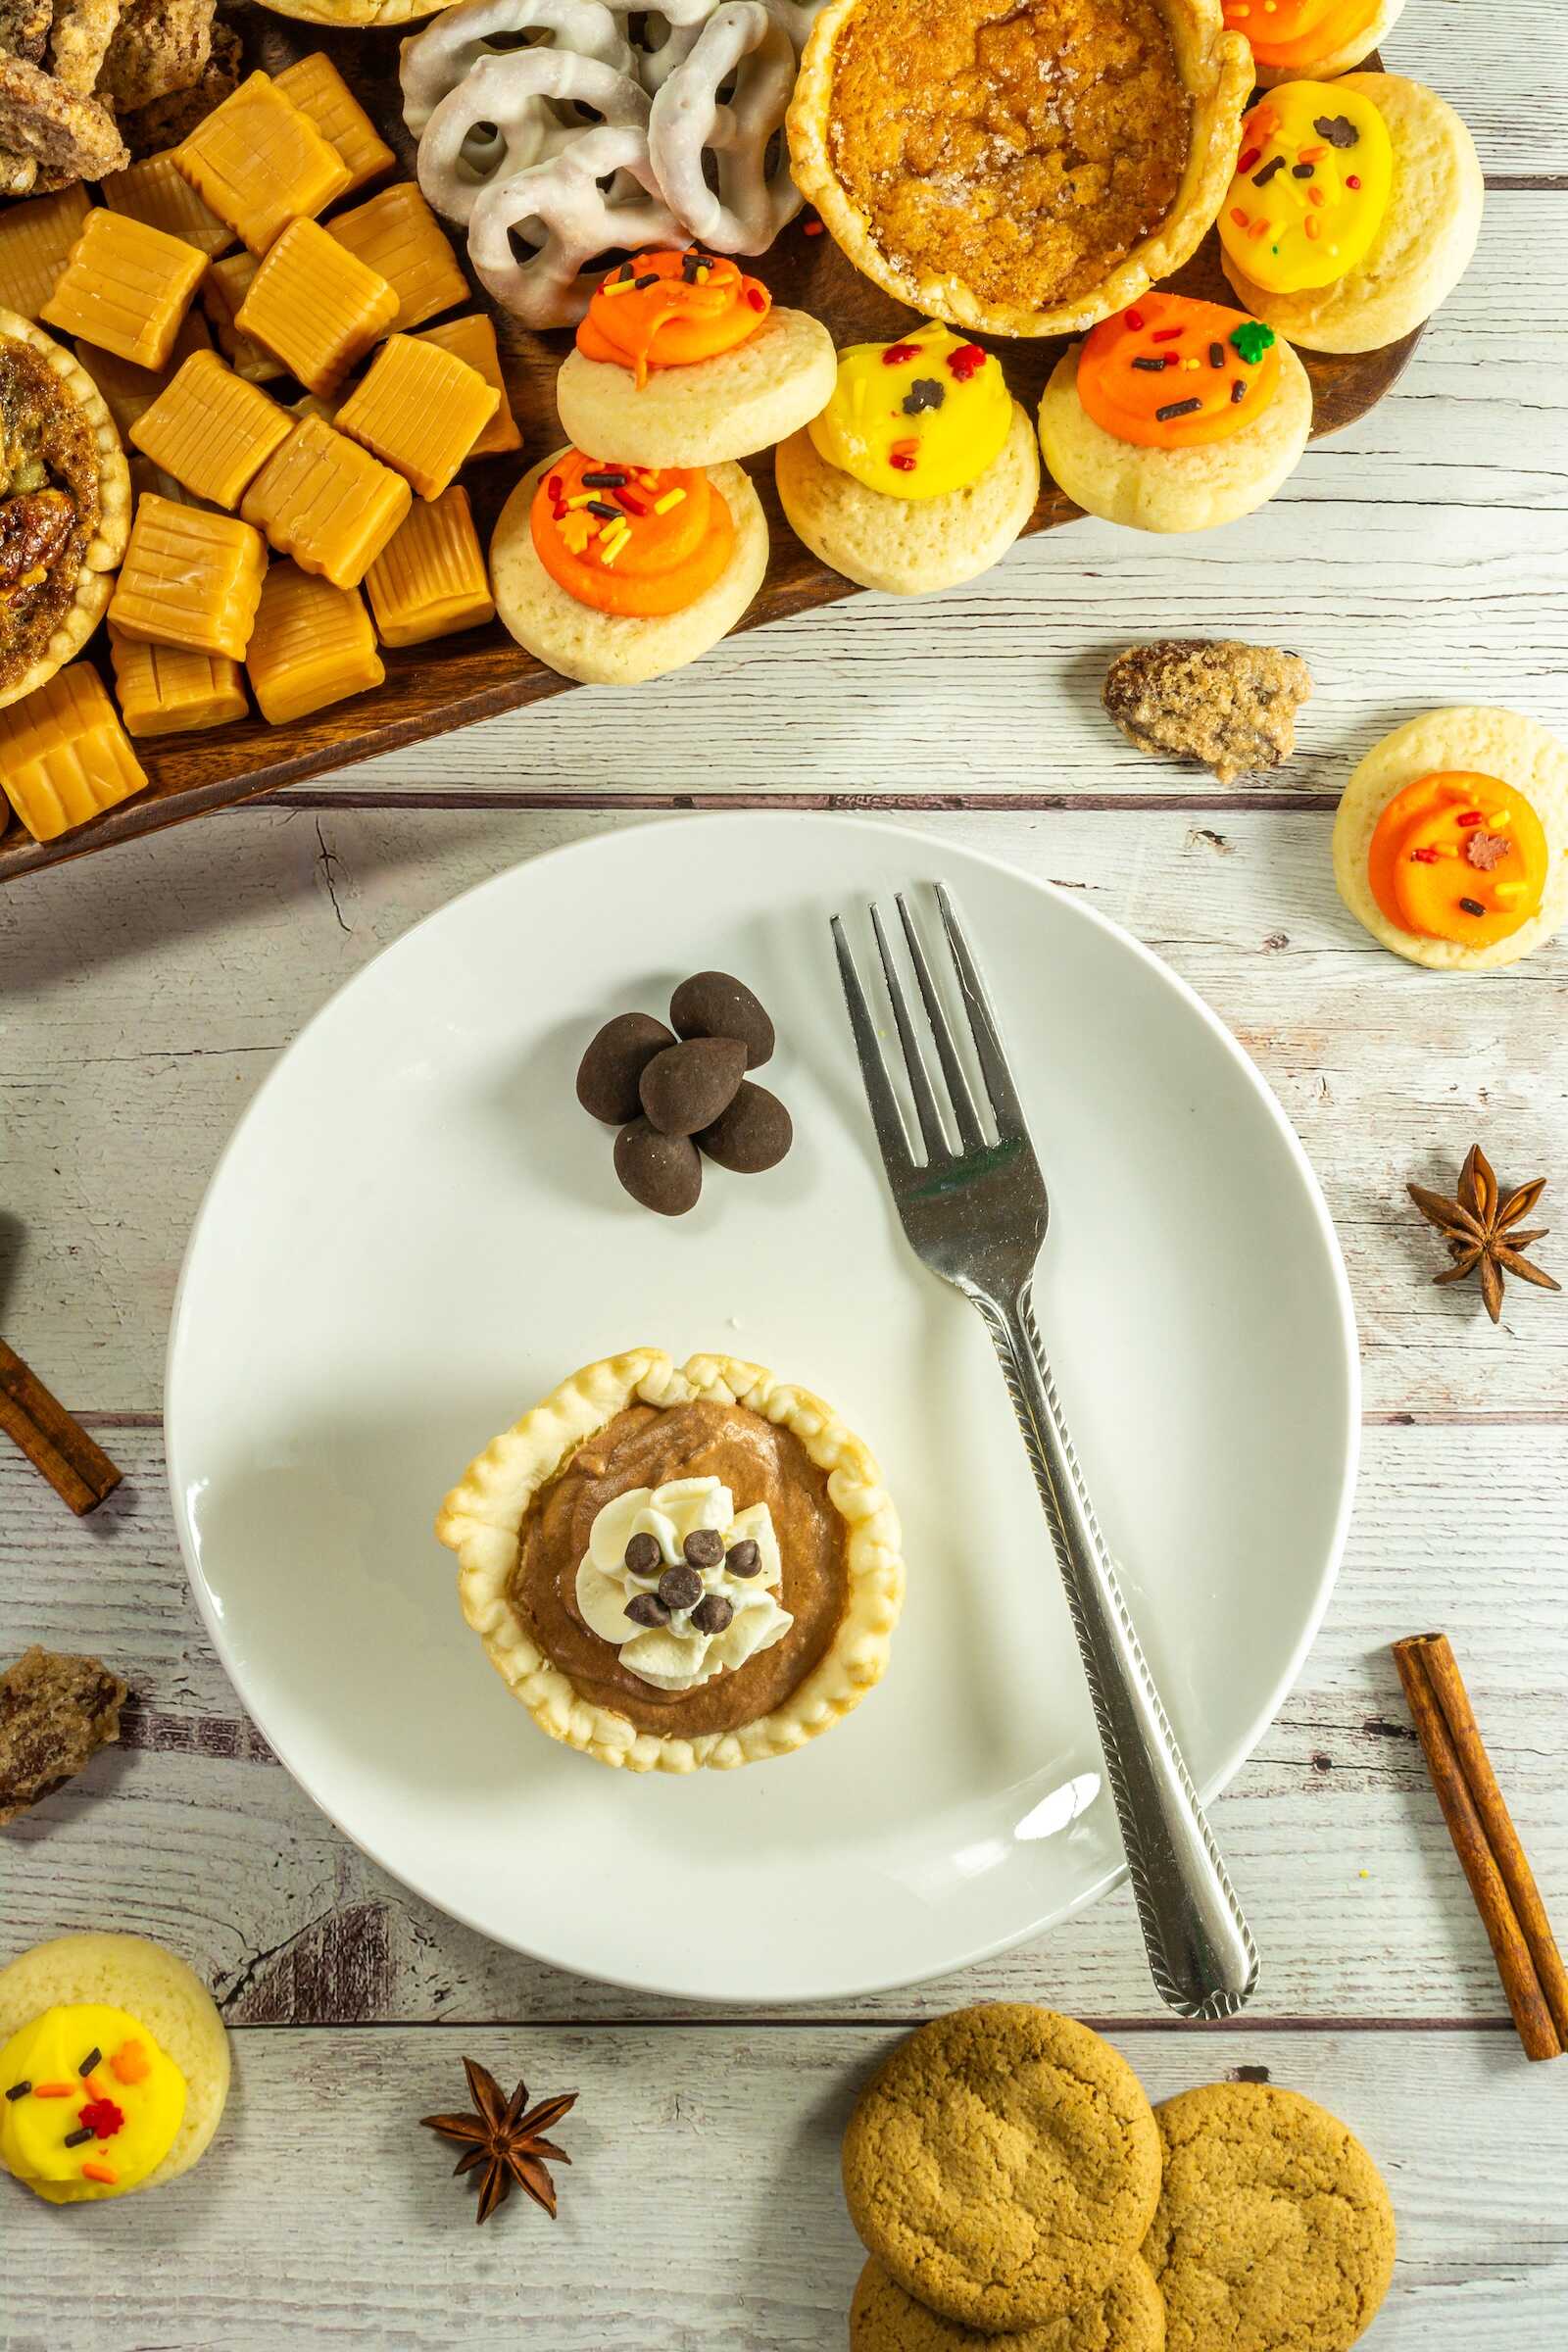
Serving Ideas for Your Fall Dessert Board
This board is incredibly versatile and works for so many occasions:
Thanksgiving dessert alternative
Perfect for guests who want “just a taste” of everything without committing to a full slice of pie.
Friendsgiving gatherings
Everyone loves sampling the mini pies and candies.
Fall movie nights
Set the board in the center of a coffee table for a cozy, snackable experience.
Harvest parties or pumpkin patch gatherings
Make a kid-friendly version with themed sugar cookies and gummies.
Office potlucks
Dessert boards transport easily and look impressive without any reheating.
You can also pair your board with:
- Hot apple cider
- Pumpkin spice lattes
- Hot cocoa
- Mulled wine
- Chai tea
The warm drinks complement the sweet treats beautifully.
Ingredient Swaps & Add-On Ideas
One of the best parts of making a dessert board is how customizable it is. Here are more ideas to mix, match, and personalize:
Swap the mini pies for:
- Mini cheesecakes
- Pumpkin bars
- Apple turnovers
- Doughnut holes
Add more cookies:
- Snickerdoodles
- Oatmeal cookies
- Shortbread
- Chocolate chip cookies (fall M&M version!)
Add bite-size baked goods:
- Brownie bites
- Pumpkin muffins
- Carrot cake squares
- Biscotti
Add more candies:
- Salted caramel truffles
- Rolos
- Butterscotch candies
- Candy corn (classic or caramel apple flavor)
Add savory touches, if desired:
- Festive cheese wedges
- Crackers
- Marcona almonds
Sweet + savory is always a crowd-pleaser.
Storage Instructions
To ensure everything stays fresh:
Pies & Cookies
Store in an airtight container in the refrigerator for up to 2 days.
Candies & Nuts
Store at room temperature in sealed bags or containers for up to 1 week.
Board Assembly Tip
Assemble the board right before serving for the best texture and color.
Make-Ahead Tips for Busy Hosts
If you’re hosting Thanksgiving, Friendsgiving, or a fall party, here’s how to prep ahead without losing freshness:
- Buy all ingredients 2–3 days in advance
- Store cookies and candies separately
- Pre-plan your board layout on the counter
- Wash and dry the board the night before
- Assemble everything 1–2 hours before guests arrive
When time is tight, dessert boards truly shine—they welcome abundance with minimal effort.
Final Thoughts – Why This Fall Dessert Board Will Be Your New Go-To
There’s something magical about fall flavors, and this dessert board captures that cozy, nostalgic feeling in every bite. It’s colorful, fun, visually stunning, and incredibly easy to make. Whether you’re hosting a holiday event or simply want to elevate a quiet weekend at home, this board is guaranteed to bring smiles, warmth, and delicious variety to your table.
And the best part? You can adapt it again and again—swap the treats, change the colors, add homemade goodies, or make it kid-themed or gourmet. It’s flexible, festive, and always impressive.
If you create this Fall Dessert Board, be sure to share it on Pinterest or Instagram—you’ll definitely inspire others to make their own!